Showing posts with label Spring Cards. Show all posts

Monday, April 28, 2014

Welcome Spring with Imaginisce

Welcome Spring is a happy new line of papers and embellishments from Imaginisce/American Crafts. I've created some cards, layouts and a mini-album using this joyous new line filled with springy colors. 
 Martha Stewart butterfly punches, Imaginisce die-cut cardstock shapes, and Pebbles printed bags helped get my imagination going. Inspiration on how to create the unique folds of a few of the cards came from Card Maker magazine.


Here are a few layouts with Bo-Bunny Cardstock and Welcome Spring patterned papers:
 A grouping including Maya Road bingo marker and acetate tickets, wooden and chipboard buttons add masculinity to the layout:


 I love WASHI tape and WeRMemory Keepers has Chevron shaped tape-I used STONE on my layout below:
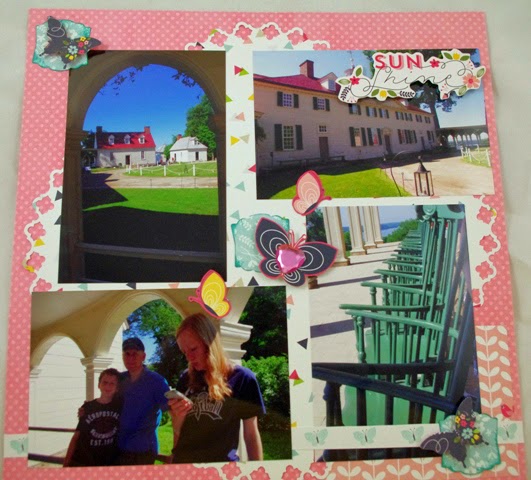
 To adorn my the layout I created for my daughter, I used some fussy cut butterflies from the Hello Spring line and a We R Memory Keepers punch 6 inch Trellis Mini-8-Punch for the white background paper. I cut the 12x12 white printed paper down to 10x10 and then used the punch on the corners, turned the paper "on point" or in a diamond shape and adhered it to the pink cardstock. I then placed photos over the parts of the white punched paper that were straight to make the white printed paper look like I had cut the entire 10x10 edge background piece all the way around the edges (but I really didn't).


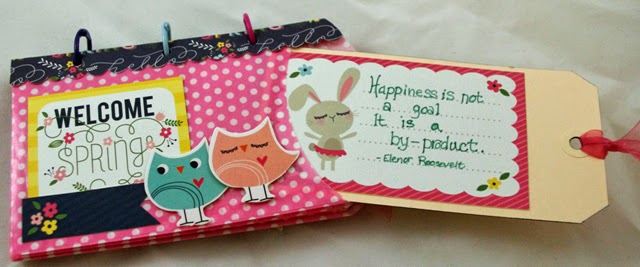
 Pebbles printed bags are the perfect mini-album backdrop for the Welcome Spring papers from Imaginisce/American Crafts:
 I cut a piece of printed paper to the same length as the printed bag, accordion folded it, then scallop punched the front edge only.
 I used Zip Dry liquid adhesive on the front and back upper edge of the printed bags and in the inside gutter of the accordion folded papers to adhere the "pages" or pockets to the top binding. I used my Crop-a-Dile to punch through the binding and placed three hinged rings in the holes for added stability.
 I used the journaling cardstock paper from the Welcome spring line and die-cut cardstock shapes for embellishment throughout the book.

 We R Memory Keepers Chevron Washi tape (stone) was used as a border:
 EK Success 2.25" circle punched was used for pictures on some pages and 2.5" circle punch was used to create a background circle for the 2.25" punched pictures. I used Distress Markers in chipped saphire, peacock feathers, evergreen bough on journaling pieces, and an American Crafts Slick Writer in Black on the printed bags.
Thanks for checking out this month's projects! Remember, you can pick up all of these goodies at The Scrapbooking Studio, Moline, IL online or at their store.

Wednesday, February 27, 2013

{Class} Copic Cards March 27 6-8pm The Scrapbooking Studio

Create these five silly Spring Cards using stamps from Inky Antics, October Afternoon, papers from October Afternoon, My Mind's Eye, Reminisce, Echo Park, and jillibean soup. Techniques to color using Copic Markers on vellum, wood, fabric/textured images and more!


Find out how to create fun dimensional cards like this one:

Join me, Shelly Maxwell, on Wednesday, March 27, 2013 from 6-8pm. All Copic products are 25% off during class time-so this is an excellent time to stock up on markers, refills, Spica glitter pens and more. Call the store to register at 309-736-7242 Cost is $19. The Scrapbooking Studio, 1623 5th Avenue, Moline, IL 61265


Wednesday, January 18, 2012

{Tip} Choosing Springy Copic colors


Spring and Easter are right around the corner, chances are your cards are going to reflect the season change. Get ready now by making sure your Copic collection has bright Spring colors from the YG, RV & Y color families.
Remember to pick at least two colors from each color family, pick a shade lighter than you think you may need. It's easy to add more color; but hard to take it away!
For blossoms, you may want to pick colors from the RV or Y color families.
Here's a quick refresher on the Copic marker labeling system:
I'll use RV 32 as an example. RV represents the color family "red/violet", the "3" is the intensity level so the partner for RV32 will also start with RV3_. The final number in the label, the "2" is the brightness level. I'll choose RV34 as the partner for my RV32.
I am using YG63, YG67, RV32, RV34, Y02, Y04, and Y08 on my stamped Paper Smooches images below. Paper Smooches acrylic stamp company has great images to use with Copic makers because of the open stamp designs.
Supplies:
Paper: BazzillAuthentique Splendid
Stamps: Paper Smooches Friendly Flowers
Punches: EK Success corner punch, Martha Stewart border punch
Die: Tim Holtz border die
Other: Bling & Maya Road Posie

Wednesday, April 27, 2011

"In Bloom" Spring Card Class - The Scrapbooking Studio

Reminisce's Spring line of papers/stickers "In Bloom" is front and center during this two hour card class. Each student will create eight Spring cards for birthdays, celebrations, weddings, saying "Hello" and more (Mother's Day cards can be birthday as well). Class begins at 11am-1pm on Saturday, May 28, 2011 at The Scrapbooking Studio located in Moline, IL. (309) 736-7242 (Call to reserve your seat in class or to order a "to go" kit!). Cost is only $18. Techniques include: stamping with glue pads & Pearl Ex, several uses for Tattered Angel's glimmer mist & glimmer glaze, a chance to play with the newest Sizzix Spring embossing dies, set your butterflies free with the Martha Stewart butterfly punch, create a gathered border with Tim Holtz's tissue tape, make things sparkly with bling, Prima flowers, twine, & Prima baubles (love them!), Maya Road wooden buttons (I wonder what we'll do with them?), Canvas Home Basics Mini-Bags, and lots more. Each participant will also receive an entire 12x12 sheet of Reminisce's "In Bloom" border stickers, tags, photo corners, and phrases (you'll have lots of leftovers to create even more cards after class). Envelopes and color photo instructions included with each kit. Register for classes or order your "to go" kit today!


Thanks for taking a look at the cards! Please spread the word...