Showing posts with label copic. Show all posts

Saturday, February 20, 2016

Copic Faces and Hair: March 16, 2016 6-8 PM Scrapmania-Cedar Rapids IA

Copic Faces and Hair: Wednesday, March 16, 2016 6-8 PM 
Scrapmania 224 Collins Road, Cedar Rapids IA 52402
Register by Calling (319) 377-9999

Please join me, Shelly Maxwell, at Scrapmania on Wednesday, March 16, 2016 from 6-8PM.
 The four cards we create in class will feature Face and Hair coloring techniques using Copic Markers, CC.Designs and Whimsy stamps, and the newest papers from Kaiser and Ella & Viv. Each student also receives the book:
 Copic Coloring Faces & Hair.
Practice images, color photos, instructions and four card designs will also be available in class.

Cost $34.00 ($20 due at registration and $14 teacher fee due on day of class)
Call now to register (only 10 seats available): 319-377-9999


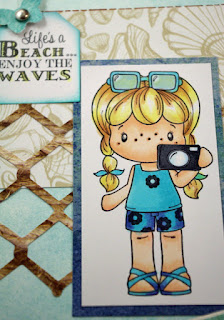
 Technique: Coloring Wavy Hair

 Technique: Coloring Simple Faces
Technique: Coloring Glasses, Coloring Straight Hair
Please bring the following Copic markers to class with you:
E000, E21, E13, E31, E50, E53, E55, E57, E79, E93, 
Colorless Blender, Y00, Y02, BV02, C2, C6, C8.
  • We will also use these markers in class; but not as much: YR14, Y11, Y35, BG01, BG02, B41, B45, BV04, R05, R08, R20.
  • You will need pop dots, a glue pen and your favorite adhesive to assemble the cards.
  • If you own these pens please bring them as well: Opaque White pen, Silver Pen, Wink of Stella glitter pens: Clear, Brown, Silver, Light Green, Yellow (Brush)

Thanks for taking a look! 
Remember to register by calling Scrapmania: 319-377-9999 
See you at class.

Sunday, January 24, 2016

Copic Flower Card Class: Feb. 24, 2016 6-8PM Call Scrapmania to Register now: 319-377-9999

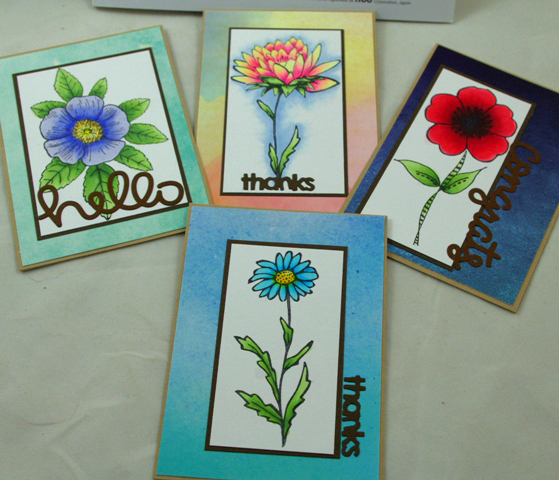
Learn how to color flowers using Copic Markers!
 Each student will receive a copy of the book shown: 
Coloring Flowers with Copic Markers.
 Please join me, Shelly Maxwell, at Scrapmania on Wednesday, Feb. 24, 2016 from 6-8PM.
 These cards feature Ella and Viv Painted collection papers and Wendy Vecchi stamps. 
Practice images will also be available in class.
Cost $34.00 ($20 due at registration and $14 teacher fee due on day of class)
Call now to register (only 10 seats available): 319-377-9999
 We will learn four techniques including two-color blending, three-color blending, palette blending and adding a sky background. Lots of great tips and techniques. Please bring your own makers if you have them. We will be using the following markers in class: Colorless Blender, R43, R46, R89, G40, G43, G46, B00, B04, B41, B60, B63, B66, Y00, Y02, Y11, Y15, YG0000, RV02, RV04, FY1 (used only a small amount). You will need to bring a glue pen and your favorite adhesive. Color instructions, photos of finished cards, and envelopes are also provided.

Tuesday, October 6, 2015

BoBunny Design Team: Enchanted Forest with Shelly Maxwell

Enchanted Forest from BoBunny is a rich harvest of Butterflies, Sunflowers, Fairies, and more! Each double-sided heavy cardstock piece of 12x12 archival safe paper is seeded with rich, heartwarming images that you will "Fall" in love with just like I did. I've put together several autumnal themed pieces from this collection. Take a quick break and hopefully become inspired to create something of your own:


A layout, banner and card collection using Tim Holtz and  Taylored Expression dies. Here's the Layout:
Create this butterfly using a large butterfly stamp on vellum paper with Staz-on ink. Fussy cut image and flip it over. Use Copic markers on the "back side" to color butterfly. Adhere to layout with glue dots just below the body of the butterfly and allow the wings to be "free".


An Enchanted Forest banner with a message:

"Give Thanks" uses die cut letters from Tim Holtz's alphabet die.
 I used a gold metallic pen around the edges to add an outline pattern or "faux" stitching.
A Thankful collection of cards:


 A large tag folded in half serves as the base for this approximately 4x4" card. Eyelet and twine added for embellishments: 
Stop by The Scrapbook Studio, Moline IL for all your scrapbooking, cardmaking, and craft projects and grab some Enchanted Forest goodies while you're there, too! 

Sunday, February 22, 2015

Register Now: March Copic Card Class March 4, 2015 6-8PM

Register NOW for 
March 4, 2015 6-8 PM
March Copic Card Class
The Scrapbooking Studio
 1623 5th Ave. Moline, IL
309-797-2403 (New Number)
 We will create five cards using Copic Markers to color pre-stamped images.
 Two Easter, one anniversary and two birthday cards.
 Please bring the following Copic Markers to class with you on Wednesday, March 4, 2015:
T2, T3, E23, E25, C2, C5, R20, R22, Y02, Y08,  BG10, and YG05.
 We will also be using several of the Spica Glitter Pens: Black, silver, clear, yellow, orange, pink, buttermilk, and lemon. We will be using a corner rounder, tiny attacher, fringe scissors (Martha Stewart), brushed corduroy distress ink & small blending tool, 1/8" double sided tape (I will bring mine along if you're unable to find this item). You will also need your favorite adhesives, along with glue dots, and both large and small pop dots. 
We will be working with a newer product "Chalksters", adding color to dry embossed mats, inking edges with Copics, and lots more-so don't miss out! Call the store (709) 797-2403 to register for class or follow this class link to sign up online.
The Scrapbooking Studio
 1623 5th Ave. Moline, IL
309-797-2403 (New Number)

Friday, April 19, 2013

{Project} BoBunny's Isabella Collection

This project came together quickly for me due to the inspirational and whimsical nature of the three metal flower pieces from Maya Road. The flowers are attached to a black chipboard base, I used paper from the Isabella collection for the flower backgrounds coupled with inspirational stamped word pieces on punched labels (pop-dotted) for dramatic effect in each flower. 
Studio Calico Canvas butterflies are AWESOME and come with about a bazillion in one package-I used my  Copic Markers to color this smaller chipboard canvas butterfly in matching grey and pink tones and used the Bo-Bunny Isabella gems to enhance the butterfly even more.

 To create the center circle I added pink bling around the interior wall of the flower and also as the bow's center. I added a small chipboard butterfly from the 12 x 12 chipboard embellishment page from the Isabella collection.
And for the third and final flower embellishment I used a fussy cut butterfly on a pop-dot. I gently folded the butterfly's wings upward as if he is lifting right off of the flower. Photo corners at the bottom of the wall hanging give it a finished look. I used a border chipboard trim piece from the 12 x 12 chipboard piece across the top of the base of the piece and pink twill through holes at the upper corners tied in a bow allowing the piece to hang.
You can create this too-just stop by
 1623 5th Avenue,
 Moline, IL 61265
 309-736-7242


Friday, July 27, 2012

The Lawn Ranger...


Copic Markers are alcohol-based markers that become acid free as soon as the alcohol dries. The thing that makes them different from water based markers is that they don't tear up the surface of the paper as you layer one color on top of another. This does happen with water based markers. Layering the colors is what will give your stamped image those awesome shaded areas!
Copic markers are available is several different types (Sketch, Copic, and Ciao among others). The difference between these types is the number of colors they are available in (The Sketch Marker is available in 358 colors, the Copic Marker comes in  214 colors, and the Ciao is available in 180 colors), their airbrush compatibility, nib types that you can use in them, and ink capacity in the barrel of the marker.
The Ciao Markers hold the least amount of ink and therefore are usually a little less expensive then the others. The Copic has the most nib choices. All markers are refilled with the same type of ink. Refills are available so NEVER through away your Copic Makers!!!
All Copic markers are labeled with embedded information so it will never rub off!
I used my Copic markers to create this 6x6 Lawn Ranger card. He's pretty funny!
Posted Image
http://img.photobucket.com/albums/1003/lverburg/AWDML%20Photos/AWDMLSuppliesGraphic.gif
Markers: Copic

Friday, July 6, 2012

{Layout} Summer Fresh from Simple Stories


Shelly here with a 12x12 layout I would like to share with you using the Summer Fresh line of papers from Simple Stories (6x6 Pad used here) along with Sizzix Hero Arts Butterflies #3 die/stamp set, and Copic markers.
Have you ever tried to create a layout using  6x6 papers from paper pads? I challenge you to give it a try! The great thing about many of the 6x6 pads (this one especially) is that it contains papers with smaller print papers-perfect for smaller projects, and it also contains several titles, journaling spots, card greetings, and adorable die cuts. I used several of these on this layout.
I also used the Hero Arts die/stamp set Butterflies #3 to create the three butterflies on the layout (they are pop-dotted), I colored them using Copic markers.
Copic Hint: When using Copic markers to color stamped images be sure to use Xpress-It blending paper (it's behind the counter-just ask for it) to stamp the image onto and use Tsukineko's Memento Ink or Distress Ink so that your images don't bleed. 
Love this happy paper line! :)

Tuesday, May 29, 2012


Join me, Shelly Maxwell, Wednesday, June 13, 2012 6-8PM, to create five masculine cards using Bo-Bunny's Weekend Market paper line, Indie washi tape, twill, twine, Claudine Hellmuth So Retro and Stamper's Anonymous Tim Holtz Road Trip Stamps, and the following Copic Markers: BG10, E15, E13, YG95, YG99, B02, Blender, YG000, YG00, YG01, C0, C2, C5, C8, B41, B45, BV20, Spica Glitter Pens.

 We will create Happy Birthday, Thinking of You, Thank You cards and a few more! 

Please bring to class: small pointy scissors, pop dots, glue dots, tiny attacher (or borrow mine), your favorite adhesive. Cost $19. Reserve your spot by registering at The Scrapbooking Studio (309) 736-7242.

Saturday, April 28, 2012

{Challenge} Use Yellow on a Card or Layout


Posted Image
Create a card or layout using the color YELLOW! It's Springy out there in the world so why not add a bit of yellow springy cheer? I love the new Fabrication papers from Teresa Collins and all of the floral stamps that are available now.
Here's my card sample using yellow printed papers and several Copic markers from the yellow family:
To create a card like this one cut cardstock 4" x 11" and fold at 5.5". Use a border punch along the front bottom edge of the paper. Use a mat for background behind stamped image like the scallop mat I cut using an Accucut die and machine. Next stamp an image onto paper and color in with markers or water color pencils. Adhere stamped image to a mat in a similar shape to the stamped image (oval in my sample). Use ribbon to visually anchor mat/stamped image to lower section of the card. Use pop dots to add even more dimension when adhering stamped image/mat to card front. Stamp small greeting and tuck behind stam
ped image. Cut inside card liner in matching cardstock color and adhere to inside of card so that it shows through the punched lower border.
Copics:
http://img.photobucket.com/albums/1003/lverburg/AWDML%20Photos/AWDMLSuppliesGraphic.gif
Papers: Bazzill cardstock, Teresa Collins Fabrications Yellow Flower
Stamps: Inky Antics Oval Tulips, Hero Arts "Just for You"
Pens/Markers: Copic (See Photo inset with colors), Spica glitter pens in Garnet, mint, lemon, orange, and clear
Punches: Martha Stewart border punch, Stampin' Up small oval punch
Dies: Spellbinder, Accucut
Ribbon: Little Black Dress Designs Lip Smackin' Ribbon Ensemble-Green
Adhesive: Pop dots
Posted Image

Saturday, March 10, 2012

Copic Card Class-April 2012 The Scrapbooking Studio

April Copic Card class features Authentic papers from their new line Genuine. Each class participant will create SIX cards using Genuine papers, and an entire sheet of Genuine Elements, along with Maya Road wooden doilies (totally cool), gorgeous ribbons, and the newest stamps from Dylusions by Dyan Reareiem, and Studio 490 by Wendy Vecchi, and of course COPIC markers! (I will use the following colors in class:  E31, E33, E35, B02, B04, B41, B45, Y 02,Y04, Y08, Y32,Y35, Y38, YG63, YG67, YG91, YG95, YG99, BG13, BG15)

Date: Wednesday, April 18, 2012 6-8pm
Location: The Scrapbooking Studio, 1623 5th Avenue, Moline, IL 61265
Registration: Call (309) 736-7242
Cost: $19.00


Wednesday, February 22, 2012

{Tip/Technique} Add Dimension & Texture

Adding Dimension and Texture to your project adds interest too. Don't hesitate to include ribbon, dimension (with pop dots) or with Honey Pop paper from Inky Antics (a featured manufacturer this month at A Walk Down Memory Lane) or pins, etc. You will love the "WOW" factor!
Here's how to do it:
Create a ribbon tab by folding a 2" piece of ribbon in half and staple it to the project with a Tiny Attacher.
I like to add ribbons as borders (run the ribbon through your Xyron first to make them stick the entire length of the ribbon) or use glue dots or staples (especially on guy themed projects).


Stamp the image on to the Honey Pop paper lining up the arrows on the stamp with those on the paper. Use pointy scissors to fussy cut the stamped image. Fold your A2 size card at 4 3/16 and 4 5/16 creating a gutter in fold of the card. Adhere the honey comb paper along both sides of the fold with the flat edge of the cut out piece in the fold.


"WOW", right?
Here's the card's front:
Dimension was added to the card front by using pop dots (both small and large) to create several layers and by tucking a pin with pennant to the top of the cupcake. Create a sweet cards using dimension for added interest and a great "WOW" factor. 

Supplies:
Papers: MME, Bazzill
Stamps: Inky Antics Cupcake Birdy, Inky Antics  Forest Friends #2
Ink Pads: Memento Tuxedo Black, Colorbox Cat Eye Ink Pads
Adhesive: Xyron, Pop Dots
Tools: Martha Stewart scoring tool, EK Success corner punch & label punch, label punch,  pointy scissors