Sunday, December 28, 2014

Rescheduled!: Valentine Copic Card Class Jan. 7, 2015 6-8PM changed to 1/14/15

Due to extreme low temperatures today 1/7/15 this class is being rescheduled to 1/14/15!
Registration is now OPEN for the Valentine Copic Card Class
 January 7, 2015 6-8PM
The Scrapbooking Studio located in Moline, IL
Register by calling (309) 736-7242
Register online at www.thescrapbookingstudio.com
We will be creating five Valentine cards using Basic Grey printed papers and brads, Copic Markers, Doodlebug Heart Jewels, Twinery Red Shimmer Baker's Twine, and tons more! 
 We will be creating a heart flip card (above) and a circle cut-out card (below). I will be teaching three Colorless Blender Techniques during class.
 NEW THIS YEAR: You will need to supply you own Copic Markers for class. Please bring the following markers with you to class: E00, E17, E18, E19, E21, E23, R24, R27, RV32, RV34 and the Colorless Blender. We will also be using the following Spica glitter pens: Red, Orange, Silver, Clear.

Also, please bring a glue pen, large and small pop dots, large and small glue dots, pointy scissors for cutting. 
Each class kit includes color photographs of the cards along with detailed instructions for completing on your own if desired.
 Please call and reserve your seat for class or your kit to go by calling The Scapbooking Studio at 309-736-7242. Cost for this class is $20/kit.

Tuesday, December 2, 2014

Simple Stories Cozy Christmas Design Team Projects with Shelly Maxwell

Simple Stories Cozy Christmas is collection of double sided papers, glazed brads, cardstock bits and pieces of ephemera, enamel dots, 12x12 sticker sheet plus a TON of Holiday inspiration. 
 Christmas themes found in the Cozy Christmas collection such as poinsettias, presents, Dec. 25, mittens, snowflakes, red berries, ornaments, an old red pick-up truck with a tree in the back, Santa's hat, and lots of cheery sayings can be used throughout all of your projects. I created these cards using the double sided papers, twine, die cut pieces, and the brads:
 "No Peeking" is a phrase heard often this time of year, but it's ok to take a peek inside these cards. A sheet of journaling cards, and 4x12 title pieces made these cards come together quickly (and your's will too!).

I also wanted to share some layouts I recently created using photos my brother-in-law took when he was in high school back in the mid-70's. He was into photography and he tried a lot of effects with special camera lenses as you can see in the photo of the Maxwell family Christmas tree. I love the yellow hue the photo has.
  The die cut "dec 25" and faux polaroid picture frame paired with a brad to anchor it all to the page made a Christmas themed title for this page (and it was super easy). I used pop dots behind both to add some dimension.
 The second layout I wanted to share also features a die cut used as the title, and it also has a 3x12 title piece cut from the title paper included with this collection. I used diamond black self-adhesive photo corners to attach my photos to the page.
 The "Joy" and mittens along with the snowflakes are all pop-dotted for added dimension. I added the enamel dots to the snowflake's centers.
 Tags are a big part of the gift exchange custom associated with Christmas, and it's fun to create custom tags for your family and friends. It makes the gift even more special when the recipient opens it on Christmas day. This Graphic 45 Book Box with 3 Kraft Cards and a Binder Ring were my inspiration for this box of holiday tags:
 I sprayed the Graphic 45 Book Box with kraft exterior with Forever Red Perfect Pearls mist and then dried it, next I fussy cut the tree, and adhered it and several die cut pieces to the front, spine and inside of the box. Finally, I applied four layers of Claudine Hellmuth Studio Multi Medium finish to seal and protect the outside of the box. I alternated brush stroke directions between horizontal and vertical with each coat to create a bit of texture with the medium. I kept the exterior fairly flat with little to now embellishments for easier storage.
Lastly I created about twenty or more tags using the three large kraft tags included in the box, plus several more tags I just happened to have in my "stash". I used all different colors and sizes.
 The Cozy Christmas brads and enamel pieces work great on tiny stickers from the 12x12 sticker sheet also included in this collection.
 I love this holiday eye chart tag:
Washi tape was a fun addition to several of the tags. I decorated both sides of the tags (there were tons of embellishments to go around)and twine or ribbon was added to the top of each tag. Storage is convenient when the tags are all placed on the Binder Ring included with the box. It keeps them handy and tidy.

 Thanks for sneaking a peek at my design team projects. You can pick up all these goodies and check out all the projects in person at The Scrapbooking Studio, 1623 5th Avenue, Moline, IL 61265 309-736-7242. Check out their online shop at www.thescrapbookingstudio.com 


Monday, November 10, 2014

Christmas Distress Marker Card Class Dec. 10, 2014 6-8 PM

Registration is now OPEN: Distress Marker Christmas Card Class
Dec. 10, 2014 6-8 PM
Call The Scrapbooking Studio at 309-736-7242 to Register for Class today!
Cost $18.00/Kit
Create Five Holiday Cards including the Gift Card holder pictured below:
 We will be using Distress Markers to add shades of holiday cheer to every card!
Prima Flowers add dimension and vibrant color to your creation:
 Reminisce Christmas papers adorn each card as well as buttons, Tim Holtz Holiday die cut glitter paper greetings, 
 layers of shiny SRM doily winter wonderlands, 
 embossed SRM bag for goodies you won't want to miss!
Register for class today so you won't miss out on all the techniques and holiday fun. 
Call The Scrapbooking Studio at 309-736-7242 to Register. 
Bring to Class: your favorite adhesive, large and small pop dots, glue dots, pointy scissors for fussy cutting, tiny attacher (or borrow mine), water blending brush. We will be using the following Distress Markers in class-please bring them if you own them: Peeled Paint, Fired Brick, Forest Moss, Pine Needles, Walnut Stain, Gathered Twigs, Vintage Photo, Weathered Wood, Old Paper, Pumice Stone, Brushed Corduroy, Picket Fences, Tumbled glass, Shabby Shutters, Iced Spruce, Festive Berries, Dried Marigold, Rusty Hinge, Picked Raspbserries (a very little bit), Mustard Seed, Stormy Sky, Antique Linen, Black Soot, Scattered Straw, Spun Sugar, Evergreen Bough, 
Spica Glitter Pens: Clear, Lipstick, and Silver and a Metallic Silver Pen

Tuesday, November 4, 2014

"The Story of Us" Simple Stories Design Team Projects

This wonderful line of papers and embellishments from Simple Stories is, perhaps, one of my all-time favorite Wedding/Anniversary lines ever published. The muted colors work great with any color scheme, double sided papers offer endless options from woodgrain (see below) to stripes, arrows, dots, butterflies, and of course hearts.
 The embellishment collection includes a 48 piece cardstock die cut ephemera bits and pieces pack (used throughout the samples) and a collection of 28 Decorative Metal Brads and Tags (see flower's center and several other locations throughout these samples).
 I had fun layering several bits and pieces here along with a few brads:
 I appreciate the inclusion of this 4x6 card found on the 4x6 Horizontal Journaling Card Elements paper which lends itself to the perfect anniversary card.
 Doilies layered with hearts, and birds create this cover embellishment on a mini-album I created using "The Story of Us" Simple Stories paper line along with photos from my nephew's September 2014 wedding (Congrats Tim and Melissa!).
 The tabbed chipboard pages have tiny stickers from the 12x12 sticker sheet, I used  Charcoal Cat Eye Inks around some of the edges after I sanded them with the Tim Holtz sanding tool:
 Two hinged rings hold it all together:
Thanks for taking a peak at this week's Scrapbooking Studio Design Team pictures! Be sure to stop by The Scrapbooking Studio, 1623 5th Avenue, Moline IL 61265 to take a closer look at these and lots more projects and to check out their awesome sales. 

Saturday, November 1, 2014

Christmas Distress Art Parts Class-Wednesday, Nov. 19, 2014 6-8PM

Baby it's cold outside! so join me, Shelly Maxwell, INSIDE on 
Wednesday, Nov. 19, 2014 from 6-8 PM
for a Christmas Distress Art Parts Class
Cost/$25 per kit
We will be creating the two projects shown above. Distress Inks, Blending Tools, Stickles, wire, Crop-a-Diles, gems, paint, glitter, you name it-we'll b using a lot of it during class. 
 This home decor plaque would be great to add to your Holiday collection.
The second wall hanging project would be great to give as a gift for the holidays (or keep it for yourself).
Here's what you'll need for class:  heat tool, blending tool (small round works best with templates), 4-5 sponge tops for your blending tool, a container to carry projects home in after class (shoe box size), Tim Holtz scissors (red handled)., your favorite liquid adhesive, large glue dots.

Call to make your reservations today! 
(Space is limited for this class)
 1623 5th Avenue
 Moline, IL 61265
 309-736-7242

Thursday, October 30, 2014

Authentique Spirited Collection with Shelly Maxwell

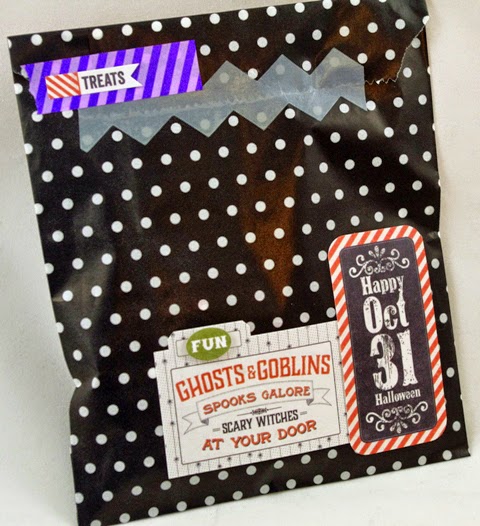
Halloween is all about the treats, right? 

Why not make them fancy with treat bags? 
Seal them up with tissue tape and a Halloween sticker greeting!
 Halloween Treat Bags
 Authentique's Spirited Line of papers is a solemn tribute to
 Halloween and all things creepy:


 Cut borders from "Labyrinth" (a two-sided cardstock weight paper) and layer, then pop dot for dimensional impact. Don't forget a spooky skeleton sticker and an enamel dot.
  These papers add maturity to the Halloween Holiday making them perfect for your teenage goblins (I have two-so I'll be stocking up!) 
Suspicious

 I loved using the orange hinge stickers to create a flap on the front of this A2 card. Plenty of stickers allow for inside decorations too!

This 6x6 chipboard mini-album came right together with spray adhesive, my crop-a-dile for punching holes and two green jump rings. I added a fluffy die cut paper flower and white tulle to the front of the card for dimension.


Grab these Halloween treats at The Scrapbooking Studio, 1623 5th Avenue, Moline IL or purchase them online at: www.thescrapbookingstudio.com. 309-736-7242