Showing posts with label Christmas. Show all posts

Thursday, October 29, 2015

Registration is now OPEN: Scrapmania Copic Christmas Card Class with Kaiser's Silver Bells 11/22/15 2-4PM

Scrapmania-Cedar Rapids, IA

Sunday, November 22, 2015 2-4PM

Holiday Copic Card Class

Call 319-377-9999 to register today!
Create five amazing holiday themed cards perfect for the winter season! Kaiser's Silver Bells papers will be featured during this two hour Copic marker class on Sunday, November 22, 2015 2-4PM at Scrapmania in Cedar Rapids, IA. 
 Create custom ribbons and doilies to match all of your upcoming holiday projects:
Snowman coloring technique:


Each kit includes a package of bling, pictures of completed cards, full color instructions for all five cards complete with techniques, envelopes, and lots more! We will focus on using Copic markers during class. Please bring the following Copic markers to class with you: E42, E43, E44, Colorless Blender, BG10, BG11, BG72, BG75, RV32, RV34, and C4 optional colors include but are not necessary: R27 and R29.  We will also use Red, Silver, and Blue Wink of Stella glitter pens and a metallic silver pen. Also, please bring pop dots, glue dots and if you have one a glue pen to class with you as well.
Register today by calling 319-377-9999 Scrapmania
Cost $23/kit

Saturday, November 1, 2014

Christmas Distress Art Parts Class-Wednesday, Nov. 19, 2014 6-8PM

Baby it's cold outside! so join me, Shelly Maxwell, INSIDE on 
Wednesday, Nov. 19, 2014 from 6-8 PM
for a Christmas Distress Art Parts Class
Cost/$25 per kit
We will be creating the two projects shown above. Distress Inks, Blending Tools, Stickles, wire, Crop-a-Diles, gems, paint, glitter, you name it-we'll b using a lot of it during class. 
 This home decor plaque would be great to add to your Holiday collection.
The second wall hanging project would be great to give as a gift for the holidays (or keep it for yourself).
Here's what you'll need for class:  heat tool, blending tool (small round works best with templates), 4-5 sponge tops for your blending tool, a container to carry projects home in after class (shoe box size), Tim Holtz scissors (red handled)., your favorite liquid adhesive, large glue dots.

Call to make your reservations today! 
(Space is limited for this class)
 1623 5th Avenue
 Moline, IL 61265
 309-736-7242

Sunday, November 24, 2013

MME Vintage Christmas Design Team Layouts, Mini-Album, and Cards!

I would love to share some layouts, a mini-album and cards designed with MME's Vintage Christmas line of papers, stickers, dimensional stickers, tags, brads, and more (all available at The Scrapbooking Studio, Moline, IL):
 MME Vintage Christmas
 These 12x12 layouts (above and below) of my children Julianne an Charlie with our dog, Blake, went together quickly and look great thanks to the beautiful rich colors and easy to design with pages by MME.

 This super chunky mini-album feels great in your hands-it's wooden and from Kaiser. I used Washi tape around the edges and adhered the paper to the pages using a tape roller, then sanded the edges using the Tim Holtz sanding tool.
 Tiny jingle bells on the front cover give the album a layer of sound along with the visual layers created with dimensional stickers and ribbons.


 I die cut and matted with the same shape for some of the pictures.
 The diversity of the shapes and sizes of stickers that accompany this line of product allows the user lots and lots of choices for card fronts and insides. These two went to gether quickly with the inspiration from the papers, wooden buttons and washers, twine, ribbon, and brads.


Thanks for taking a peak and don't forget to stop by the online store or the Moline location of The Scrapbooking Studio to pick up all your Christmas goodies!

Monday, September 16, 2013

{Class} Copic Marker Christmas Card Class-October 16, 2013

Join me, Shelly Maxwell, for card class on Wednesday, October 16, 2013 from 6-8pm at The Scrapbooking Studio, 1623 5th Avenue, Moline, IL 61265 
We Will be creating five Christmas cards using the newest line of papers from Bazzill and the newest dies, embossing folders, and more from Sizzix to create two pop-up cards, a dry embossed card, pretty ribbons, flowers, buttons, and  brads. Create five cards using Copic markers to color pre-stamped images. 
 You'll also receive color photos of all the cards, complete instructions, and envelopes for each card.
 Don't have any markers? No worries-you are welcome to borrow mine during class. Copic markers are all 25% off during class-so you can stock up and save big!
Register today by calling Holly at The Scrapbooking Studio: 309-736-7242
Cost $19
October 16, 2013 6-8pm

Friday, September 14, 2012

{Project Idea} Thank-you Christmas Stocking Stuffer


Recently a friend of mine visited from Wisconsin. She works in an office and was given an adorable "Thank You" gift at her office from one of their clients. Once I saw it i knew I had to scrap lift it! Here's a peak at the project:
Here's a side view:
Do you see the mini-size hand sanitizer? I was able to pick up several for only $1 each recently. So keep your eyes peeled for mini-hand sanitizers and grab a bunch so you can copy the idea too.
Here's How:
  • Begin by measuring the bottle.
  •  Use a piece of ribbon or string to measure the front, bottom, back of the container and then add on at least one inch to the height on either end of the ribbon. Mine ended up being 10" long.
  •  Next measure the width of the container. Mine was 2" wide. So, if you had my container for example you will need to cut a piece of paper 2" wide by 10" long.
  • Use a scoring tool to create the boxed bottom (mine was about an inch wide).
  • Grab a flower punch and punch papers to create layered flowers.
  •  Stamp sentiment or use stickers in center of flowers.
  • Tie a ribbon around paper and bottle to secure your "wrap" around the hand sanitizer bottle.
Don't forget to decorate the back side too so that's it's pretty from every angle!

Friday, November 25, 2011

Start a New Holiday Tradition!

Start a new Holiday Tradition: Celebrate St. Nicholas Day! Did you know that the tradition of hanging up stockings at Christmas time originated with Saint Nicholas? Legend has it that Saint Nicholas was known to throw small bags of gold coins into the open windows of poor homes. One of those bags of gold landed in a child's stocking and soon news of the event got around. St. Nicholas was from Greece and December 6th commemorates his life. He gave up his belongings and gave to the needy especially children. Modern times have changed things a bit: I attended a small private college in Wisconsin and there it was a tradition to put your shoes in the hallway (I lived in the dorm) on December 6 to see if St. Nick would visit-sometimes we would be given candy in our shoes. I thought it might be fun to start this tradition with my children this year (plus their Halloween candy buzz is almost worn off). I created some fun candy treats to tuck in their boots & shoes. The long candy tubes will look enticing and fun sticking out of their boots I think! I might even tuck one in my husband's lunch tote.
Posted Image
I used several dies to cut out toppers for the candy packages, BoBunny Christmas Papers, and Maya Road chipboard snowflakes colored with Ranger distress inks and Colorbox cat eye inks. 

Posted Image

Posted Image
Posted Image
Stickles glitter on embossed images really make them sparkle!
Posted Image
Gold metalic Colorbox Cateye ink on edges of Santa hat make it shine a tiny bit. SRM candy tubes (totally cool!!)
Posted Image

Posted Image

Supplies:
Patterned Papers: BoBunny
Ribbons: from my stash (use up some leftovers!!)
Pins, Chipboard shapes & Bingo Marker: Maya Road
Flower:Prima
Inks & Mists: Colorbox (Gold, Silver, Red), Tattered Angels,Ranger (distress ink & stain)
Plastic tubes:SRM
Dies: Sizzix (Top Note) & Spellbinders
Punch: Fiskars scallop circle 

Thursday, November 17, 2011

Tutorial: Creating acrylic mini-albums


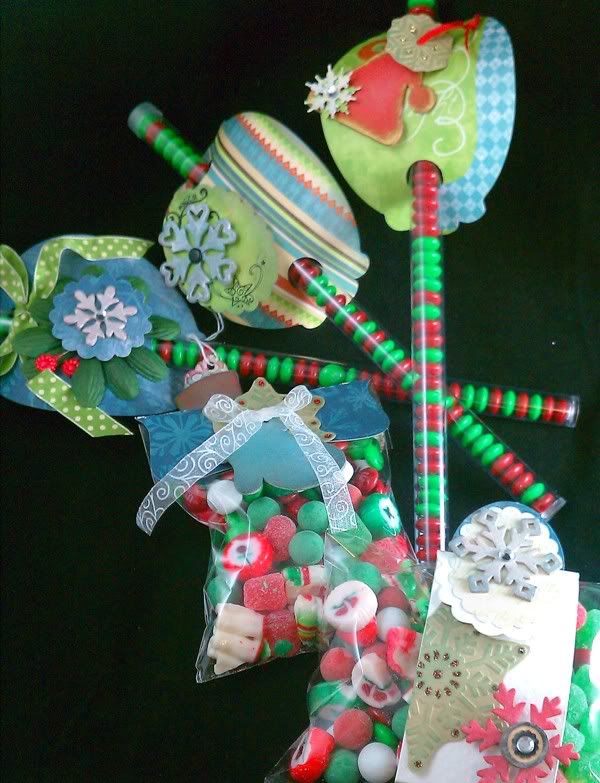
Here are some creative ideas to use when creating acrylic mini-albums: I think acrylic pages in any album create an impressive backdrop for photos. I will be showing you several ways to alter your acrylic album pages so you can start using acrylic pages in your albums too. Ready to get creative?

First, choose a mini-album. I am using Maya Road's Acrylic Coaster album. It's pages measure 2.5x3.5" each so it is quite small. Also, you will want to grab some micro or small glue dots to adhere paper to the pages and items to the pages. Glue pens also work. Your adhesive should be placed in areas that will be covered by embellishments on the "other side" of the page so try to always be thinking ahead.

Second, choose a line of paper. You will need a very small amount of paper for this size of a mini-album so scraps are perfect. I am using BoBunny's Christmas paper line Blitzen.  This is a great choice because Bo-Bunny's heavy double sided printed papers have great design elements on both sides of the paper. This is extremely important during the design portion of your album because both sides of the paper will be visible.
Third, choose your pictures. Remember, the pages are extremely tiny so one 4x6 picture may provide you with two pages of layouts.

 Also, keep in mind that very small parts of photos may be used to emphasize certain items on your pages. I will show you an example below. I used a circle punch to include the pictures of the tree ornaments. Then I matted them with another circle, adhered them with glue dots and pop dots to add a bit of dimension. 
Fourth, decide what order your pictures will be used in the mini-album. What is the story this little album will tell? Your photos don't have to be used chronologically. Because both sides of the pages/papers are visible; the entire album needs to be planned out and designed before you begin any techniques or adding paper or pictures to the pages.
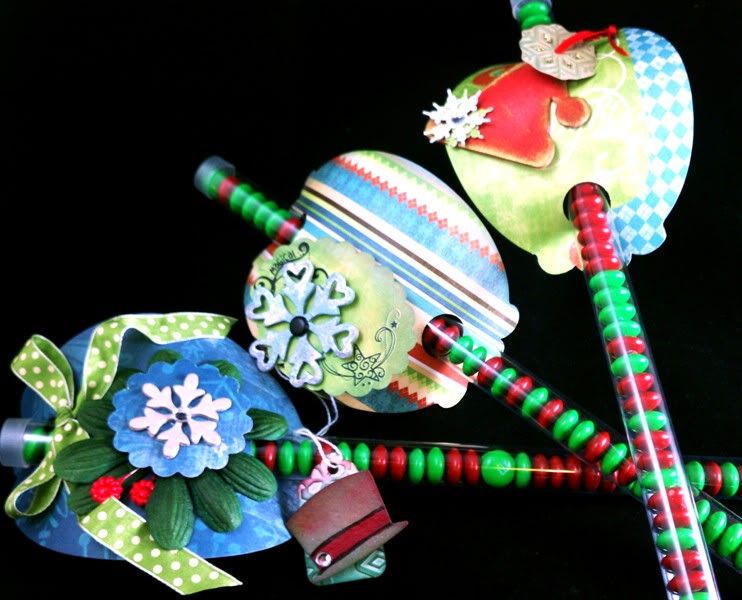
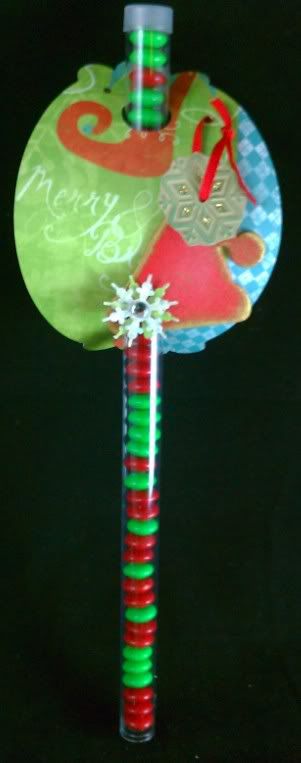
Fifth, begin the actual creation of the mini-album. I love adding "snow" and "frost" to acrylic pages because the acrylic page naturally gives the viewer a feeling of ice or liquid. Here's how to give the look of snow: add Ranger's Adirondack Dabber in Snow Cap acrylic paint around the outer edges of the page. Allow to dry or use a heat tool to quicken the process.

On the second page of the book create the look of frozen metal or "frost" by adding Ranger Adirondack Metallics Silver Dabber paint around the outer edges of the page. Again allow the page to dry or use a heat tool to quicken the process.

Next use a tiny word stamp on a die cut or punch label and adhere to the front of the second page. Also, use a snowflake punch (mine is from EK Success) and punch a few snowflakes (hearts would be great too) to place in the upper left corner of the page. Use another small lable punch to add a second seasonal word to the paper you'll be adhering to the back of page 2. Using micro-glue dots adhere the paper to the backside of page 2. Check for paper placement through the acrylic page before adhering.
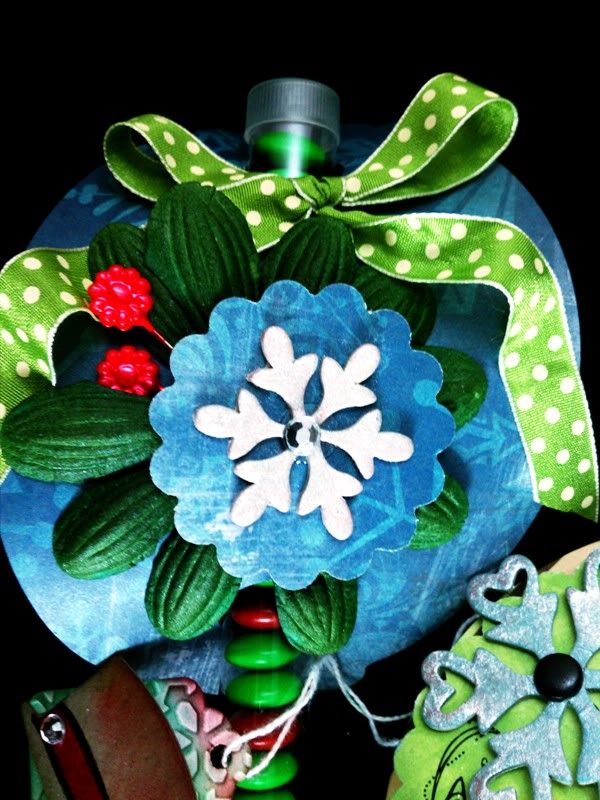
I applied a sheet of paper to the backside of page two. This can be seen all the way through the front of the album. I think it sort of looks like I am peering through several layers of ice. I added a  Maya Road chipboard snowflake (stained and glittered of course) along with a brown Maya Road flower in the center. These first two pages work together to create a snowy, frosty look setting the tone for the chilly holiday mini-album.

Sixth, continue working through your mini-album continually keeping in mind that you need to check the pages's fronts and backs before adhering anything to see what the view is through the acylic. On the fourth piece of acrylic I used alcohol inks to color the page green. I used Rangers Adirondack Earthtones in Lettuce on a piece of felt attached to a blending tool. I used a heat tool to dry the alcohol ink.

The alcohol ink creates the background behind the circle photos on the left page seen here:
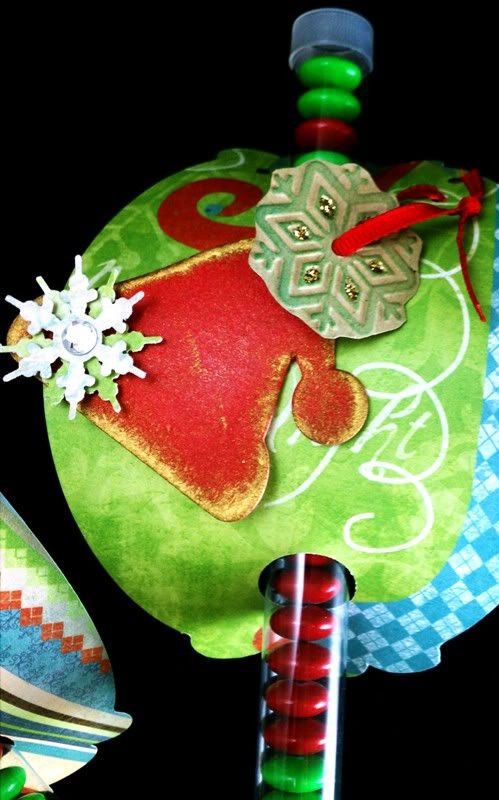
Seventh, the fifth page of the album I distressed using a sanding tool and then inks with Ranger Distress Festive Berries red ink. This effect is very suddle. (It's the left page pictured below). I used a Maya Road chipboard stocking colored with Tattered Angels glimmer mist as a journaling block.
Eighth, the sixth page of the album I stamped using a Just Rite Holiday stamp and StazOn Solvent ink in Jet Black (StazOn ink works great on acylic surfaces!). I stamped on the backside of the last page and adhered the paper to the front side of the page allowing the final "Happy Holidays" greeting to be seen through the acylic.


Have fun creating with acrylic! Hopefully, some of these ideas have inspired you to create something with acylic.
Products Used:
Mini-Album: Maya Road
Patterned Papers: Bo Bunny Blitzen
Chipboard embellishments: Maya Road
Paints: Ranger Adirondack Dabbers (Snow Cap & Silver)
Inks: Ranger Distress Ink in Festive Berries
Ink: StazOn Solvent ink Jet Black and Ranger Adirondack Alcohol Ink in Lettuce/Blending Tool
Stamps: JustRite
Bling/Pearls: Queen
Plastic Flower: Maya Road
Punches: EK Success
Adhesive: Micro Glue Dots & Glue Pen