Showing posts with label Ranger dye ink. Show all posts

Friday, July 13, 2012

{Step-by-Step} Creating Custom Mists


{Step-by-Step} Creating Mists Using the newest Ranger Distress Inks:Squeezed Lemonade, Peacock Feathers, Shaded Lilac! 

By, Shelly Maxwell

Posted Image
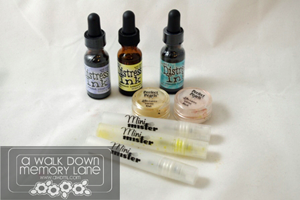
Step 1: Collect your supplies. You'll need some of the Ranger Inks, Ranger Mini-Misters, and Ranger Perfect Pearls (I used blush and Kiwi). Use a fine point Sharpie Marker to label each of your Misters with the Ink's name. You'll also need some coffee filters, white ribbon, felt, etc. to ink and a heat tool.
Posted Image
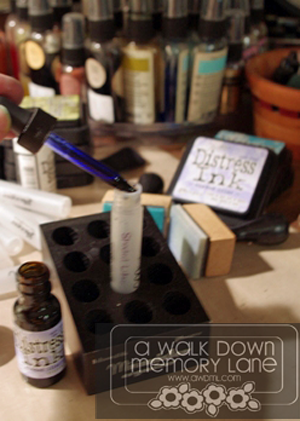
Step 2: Open your first Mister, add one dropper full of ink into the Mister.
Posted Image
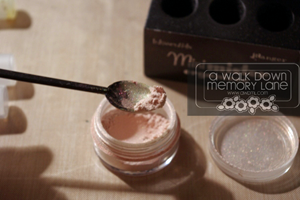
Step 3: Carefully open one of the Perfect Pearls containers and use a small scoop or tiny spoon to place a smidgen of the Perfect Pearls into the Mister with the ink.
Posted Image
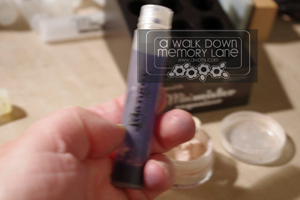
Step 4: Add enough tap water to about 1/4" down from the top of the Mister. Place the cap on the Mister and shake vigorously to mix the ink, pearls, and water.
Step 5: Use coffee filters and a die to cut several different sized flowers. (Ranger's Tattered Florals works great for this).
Posted Image
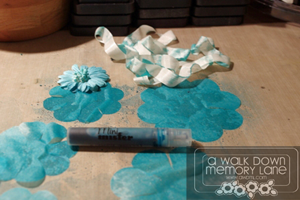
Step 6: Lay about 1/3 of the die cut flowers onto a covered surface and spray with one of the mists you just created. Use a paper towel to sop up excess overs pray, then dry the flowers using a heat tool. Next, lay down the second 1/3 of die cut flowers, spray with the second color, and so on until all flowers have been sprayed, colored, and dried.

Create beautiful flowers, ribbons, more! Use your new creations on home decor items (like the wreath pictured here), layouts and cards. Have fun creating!!
Posted Image
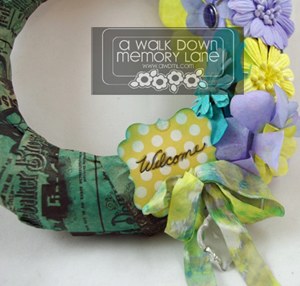
I used a 12x12 brown paper bag cut into 2" strips, sprayed with ink, dried, and then wrapped around the wreath. I used sticky dots to adhere the coffee filter and Prima inked flowers, inked silk bow, and punched "Welcome" sign.
Posted Image


Supplies:
Inks: Ranger Squeezed LemonadePeacock FeathersShaded Lilac
Supplies: MistersPerfect Pearls, Styrofoam Wreath, Brown paper bags (with print), silk ribbon
Bling: Teresa Collins crystal and brads 
Posted Image
My Blog: paperartbyshelly

Thursday, January 12, 2012

{Tutorial} Coffee Filter Custom Dyed Flowers


Shelly here with an EZ inky tutorial: Create dimensional custom dyed flowers using regular coffee filters, dye ink, and Perfect Pearls in just a few easy steps.
1. Gather your supplies: You will need four coffee filters, dye ink like Ranger Distress Ink, a small sprayer like the Ranger mini-mister, and Ranger Perfect Pearls as well as scissors, a heart shape to use as a template OR a die like  Sizzix  Flowers, 3-D #2, a heat tool, brad for flower center.
2.  Stack all four coffee filters together and fold into quarters.
3. Place heart shaped template over filter and cut around shape or die cut the four coffee filters in Vagabond (all at once) with Sizzix die:
4. Set the filters aside for a moment while you create your custom dye!
5. Collect your Perfect Pearls, Dye Ink and Ranger mini-mister. I choose colors to match my Authentique papers used on the "Hello" card pictured above.
6. Open the Mini-mister and add one dropper of dye ink into the container.
7. Open the Perfect pearls container and add a smidge of Perfect Pearls. I use a tiny plastic spoon for this.
8. Fill the rest of the Mini-Mister container with water, place the sprayer top on the container and shake, shake, shake. (Usually at this point I label the mini-mister with the dye ink color name for future reference).
9.  Set the cut coffee filters out individually on a surface that you can spray onto with out harming the counter. I use my Ranger non-stick craft sheet. Spray the filters with the mini-mister dye solution until they are saturated.
10.  Use a paper towel to soak up and puddles.
11. Dry the filters with the heat tool. Once the filters are dry, stack the filters on top of each other and use a pin to place a hole through the center of all four filters. I punched a 5/8" paper circle as a "washer" for the brad to go through and placed the washer on top of the four filters and attached all with the brad.
12. Fluff flower by folder and pinching the filters up around the brad. Fluff and flatten or keep the flower as bigger if you prefer.
13. Use a glue dot on the underside of the flower to attach to the top of a card or layout.
Create smaller flowers using a die like the Sizzix Flowers, 3-D #2 like this one I used on a layout:
6x6" Card Supplies:
Embellishments: Doodlebug Velvet brad
Tools: 5/8" circle punch, heat tool, Mini-mister, scissors, pin, heart template,  Corner punch