Friday, February 24, 2012

{Product Review} Inky Antics: HoneyPOP 3D Collection

The HoneyPOP 3D Collection from Inky Antics is a great product to pick up the next time you're in a scrappy place like AWDML. The 3D papers add a "WOW" factor to your projects and cards in a way I haven't really seen before! I love the festive layer the honeycomb feature adds to cards. The reaction I received when I showed my kids was, "Oh, cool. I like that." (They see a lot of cards-so to actually get a sentence as a reaction is pretty big).

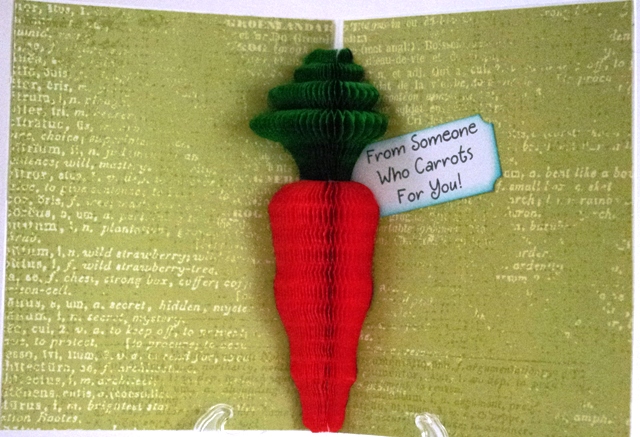
Here's a card I created using the Inky Antics Carrot Bunny HoneyPOP set:


You'll love how easy it is to create great cards with the easy to use Inky Antics Honey Pop 3D Collection. Your friends will say, "Wow, that's cool. How did you do that?" The great thing about Inky Antics HoneyPOP 3D stamps is that the package comes with well written directions that are easy to follow. You'll also want to grab some HoneyPOP paper pads along with the stamps.

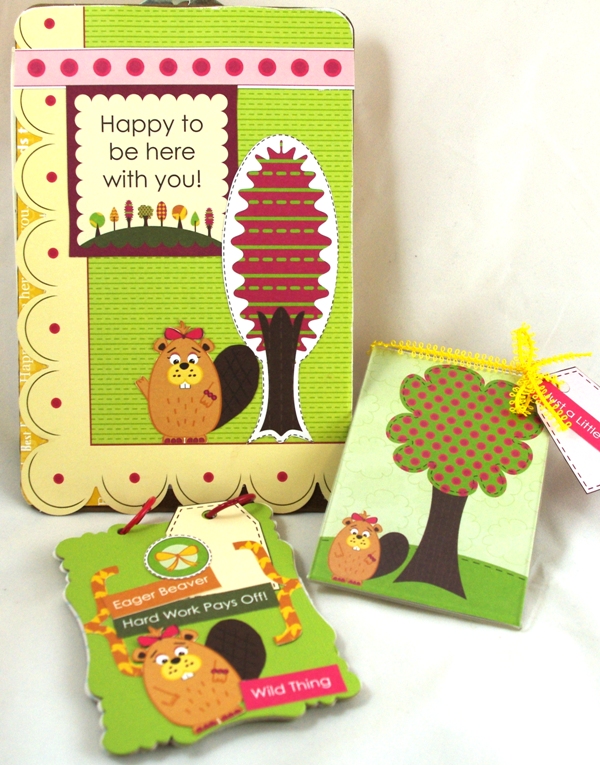
I also love that the stamp collections come with great quality acrylic stamps. The sayings are awesome too! Inky Antics not only include greetings for the outside of the card; but the inside of the card too. The cute image style and quippy sayings even make grown-ups giggle.


Hint: I used glue lines in the 1/8" gutter of the card to really hold the HoneyPop paper in place.

Supplies:
Stamps-Inky Antics 11029MC Carrot Bunny HoneyPOP Set
Paper-Inky Antics HoneyPOP paper in goldenrod and green, Little Yellow Bicycle
Pens-Copics Atyou Spica glitter pens
Adhesive: Glue lines
Ink: Colorbox Cat Eye Ink pads, Memento Black Tuxedo Ink Pad
Tools: EK Success scissors, EK Success punches, EK Success Martha Stewart scoring tool

Wednesday, February 22, 2012

{Tip/Technique} Add Dimension & Texture

Adding Dimension and Texture to your project adds interest too. Don't hesitate to include ribbon, dimension (with pop dots) or with Honey Pop paper from Inky Antics (a featured manufacturer this month at A Walk Down Memory Lane) or pins, etc. You will love the "WOW" factor!
Here's how to do it:
Create a ribbon tab by folding a 2" piece of ribbon in half and staple it to the project with a Tiny Attacher.
I like to add ribbons as borders (run the ribbon through your Xyron first to make them stick the entire length of the ribbon) or use glue dots or staples (especially on guy themed projects).


Stamp the image on to the Honey Pop paper lining up the arrows on the stamp with those on the paper. Use pointy scissors to fussy cut the stamped image. Fold your A2 size card at 4 3/16 and 4 5/16 creating a gutter in fold of the card. Adhere the honey comb paper along both sides of the fold with the flat edge of the cut out piece in the fold.


"WOW", right?
Here's the card's front:
Dimension was added to the card front by using pop dots (both small and large) to create several layers and by tucking a pin with pennant to the top of the cupcake. Create a sweet cards using dimension for added interest and a great "WOW" factor. 

Supplies:
Papers: MME, Bazzill
Stamps: Inky Antics Cupcake Birdy, Inky Antics  Forest Friends #2
Ink Pads: Memento Tuxedo Black, Colorbox Cat Eye Ink Pads
Adhesive: Xyron, Pop Dots
Tools: Martha Stewart scoring tool, EK Success corner punch & label punch, label punch,  pointy scissors

Friday, February 17, 2012

{Challenge} Use Felt on a Layout!

I love the scallop die cut 12x12 pages from Nikki Sivils! This is from the Max & Mollie paper line:
This layout features my nephew Alex and his new adorable wife Jenny at their August wedding. The storm clouds gathering in the background are real! Hmm. Anyway, back to your challenge: Use felt on a layout (or card)! Give felt a try today-it's super fun and adds a warm cozy feel to your project (plus a cool texture too). I use my Sizzix dies or Accucut dies to cut fabric and felt. I adhere the felt or fabric die cut images (here it's flowers) with glue dots.  I used Distress Ink on a few of the flowers to change their color a bit. Remember to post your creations on the AWDML blog to be entered into the monthly GC drawing for $5!


The photographer for the wedding event was:  Matt Bigelow Photographer and his website is mbigelowphotographer.com
(Thanks for letting me use the photo Matt!)


Supplies:
Papers: Nikki Sivils Max & Mollie, Bazzill
Felt: Stamp School Whip Cream
Embellishments: buttons & ribbon:stash, plastic flower:Maya Road
Tools: Vagabond
Die: Sizzix Alterations Tatterd Florals
Ink: Distress Ink
Adhesive: Glue Dots

Wednesday, February 15, 2012

{Project} Shadow Box

Miss Caroline papers combine with a shadow box, Melissa Frances frames, Maya Road gems, trinkets, wire flowers, chipboard flowers, resin flowers, and lots more (all available at The Scrapbooking Studio, Moline, IL) to create this inspirational box. I love all the options available to the designer when creating scenes in the shadow box. I used Ranger Distress stain to color the exterior of the box and the inside edges of the smaller boxes. I also used a Sizzix Distress border die to create the upper border.Bella Blvd. tiny alphas to create some of the phrases.

Tuesday, February 14, 2012

{Cards} designed with Miss Caroline from MME

Happy Valentine's Day! I hope you have some love planned for your day :)

The Miss Caroline collection from My Mind's Eye continues to keep my interest as I create cards using these double sided beauties! When they are combined with the label stickers, pins, buttons and adorable wooden butterflies you will end up with great looking cards that are sure to impress. Here are a few samples I've created using the Miss Caroline collection available now from The Scrapbooking Studio, Moline, IL

 This 5"x5" card boasts a Maya Road chipboard butterfly stained with Ranger distress stains.
 The wooden butterfly from the Miss Caroline collection was stamped with a Wendy Vecchi stamp, then painted with Tattered Angel's glimmer glam and finished around the edges with a brown distress ink MARKER (arriving at The Scrapbooking Studio very soon) and the butterfly has a clothes pin body.
 Tim Holtz stamps embellish this barn board card along with a Miss Caroline button and some twine.
 Ranger embossed card stock (inked of course) serves as the base for this baby congrats card. I've used a Maya Road chipboard butterfly that's been shimmered with Tattered Angels.

 Wendy Vecchi stamp serves as the greeting for the tag/pocket card. Maya Road chipboard butterfly and Stickles glitter gel for the body and accent. Maya Road Crystal gem for the tag topper.
 Tim Holtz stamps & Distress Ink Markers  couple with the Miss Caroline papers to create this little Easter card.
Welcome baby with a sweet flower created with Prima flower, ric rac ribbon, and label stickers.

Thanks for taking a peak at these new cards created with the Miss Caroline collection from My Mind's Eye available at The Scrapbooking Studio, Moline, IL

Monday, February 13, 2012

{Layouts} with Miss Caroline from MME

The Scrapbooking Studio in Moline, IL has the entire line of MME papers from the Miss Caroline collection! You are going to love these double sided goodies as much as I did! Great color combinations mix with pins, buttons, and label stickers to offer the designer endless combinations of woodlook textures, florals, and more. Here are a few layouts I created using the Miss Caroline collection:

 This layout also includes a chipboard butterfly from Maya Road, Prima gem border, and stamped title using Paper Smooches stamps.
 The gears are die cut using the Sizzix die, and a Tim Holtz heat embossed stamped heart image, Distress Ink & Tim Holtz tissue tape.

Finally, this layout includes a fluffy flower from Prima, date tage from Maya Road, Resin star from Melissa Frances, and velvet trim ribbon from Prima. Check back tomorrow for some card samples created with the same paper line! Thanks for taking a peak.


Sunday, February 12, 2012

{Class} Acrylic Mini-Album/Wall Hanging


Paradise Acrylic Techniques Mini-Album
Wednesday, March 15, 2012  6-8 pm
Designed by Shelly Maxwell
Cost $18.00


This wall hanging/mini-album decor item is created using Maya Road's Sakura Acrylic Mini Album. I've taken this mini-album to the next level with Ranger Alcohol Inks, Distress Ink, Acrylic Paint, Perfect pearls mist, Tattered Angels Glimmer Glaze, Prima Flowers, Copic markers, Wendy Vecchi Botanical stamps and  Staz On Ink techniques you'll be able to try in class! We will be using Graphic 45 papers from the Tropical Travelogue Collection with rich jewel tones and decorative paper clips from Basic Grey, ribbons, Prima flowers, brads and lots of technique ideas. Bring your heat tool, pointy scissors, craft sheet, and 6-8 pictures that we will punch 2.25" circles from as photos for the album.  Register by calling The Scrapbooking Studio (309) 736-7242 Moline, IL today. Seating is limited, so please don't hesitate to register.

Tuesday, February 7, 2012

{Card Challenge} Sketch!

It's card sketch challenge time! Shelly here with a great card sketch challenge. First a peak at the sketch I choose to use designed by Lucy Chesna, A Walk Down Memory Lane's Design Team member.
And here's my take on it:

This is a 6"x6" top fold card. Now, it's your turn! Let's see what you've got :) Remember to post your creations on the blog to be entered into the monthly GC drawing for $5!

Supplies:
Papers: Nikki Sivils, Bazzill
Pens: Atyou Spica Glitter pens, White Gel Pen
Dies/Embossing Folders: large circle die
Punches: corner punches
Embellishments: pearls:Hero Arts
Tools: straight crimper

Friday, February 3, 2012

{Step-by-Step} Create Desk top Delights using Nikki Sivils Beatrice the Beaver papers and Cut-ups!

Ever wish your day at work would just end so you could go home and scrapbook & create? Yeah, me too. Well, maybe these fun desk top office supplies will help make your time at "the office" fly by a little faster. I've used an acrylic frame to hold my Post-It notes, a clip board has been jazzed up, and I even have a fun pocket-sized notepad to jot down my "to do" list for the day (it's refillable too).

Hi, it's Shelly here, with a quick and easy Step-by-Step for fun additions to your space at work.
Check it out:
 Want to make a set too?

Simply collect the following items and then follow along:
1 4x6 acrylic frame
1 Post-It notepad
1.5' of ribbon
1 small clipboard
3 sheets of patterned paper
1 piece of chipboard (you will need two pieces about 4x6" or a bit larger)
1 fun die about 4x6"
2 jump rings
10-15 pages ripped out of a notebook from your son or daughter's backpack

Step 1: Create the Post-It note holder by cutting a piece of patterned paper into a 4x6" section and sliding the piece into the acrylic frame upside down.

Step 2: Tie a 1.5' piece of ribbon around the "top" of the frame (this is what would normally be the bottom). Add a tag to the ribbon and tie the ribbon into an adorable bow. 
Step 3: Attach a Post-It notepad to the upper section of the frame.
Step 4: Create the clipboard by choosing two matching pieces of patterned paper and tracing around the outside of the clipboard. Cut on the traced lines
Step 5: Place adhesive around the outer edges of the clipboard and place the patterned paper onto both sides of the clipboard. You will have to cut out around the clamp on the front. 
Step 6: Sand the front and back edges of the clipboard to remove and uneven or jagged edges.
Step 7: Create the pocket sized notebook by using a 4x6 mat die or just cutting the chipboard into a 4x6 rectangle. Cut the notebook paper using the same die.

Step 8: Cut two 4x6 pieces from patterned paper using the same die again (or by just cutting into a 4x6 shape).
Step 9: The chipboard will be the front and back covers of the notepad. Adhere the patterned papers onto the front and back pieces of the chipboard. Stack the front, inside pages, and back cover and use a Crop-a-Dile to punch holes through all layers.

Step 10: Place the two jump rings in the top (or side) of the notepad. To refill the notepad simply die cut more notebook pages and insert into the notepad.
Step 11: Take the project(s) to work with you tomorrow and enjoy!


Papers: Nikki Sivils Beatrice the Beaver paper and cut-upsBazzill
Embellishments: ribbonjump rings
Other items: Acrylic frame, small clipboard, chipboard from packaging (re-purposed).