Showing posts with label Teresa Collins. Show all posts

Saturday, February 15, 2014

"Family Stories" with Shelly Maxwell

The Family Stories line of embellishments and papers from Teresa Collins is HUGE and very versatile! Check out all of these card, mini-album and layout ideas you can create with all the goodies that are available at The Scrapbooking Studio in Moline, IL
All-occasion cards come alive with the Family Stories paper collection. The flower paper was used on the next two card fronts along with die cut paper for the flower along with Maya Road craft doily and rose flower center. The layers were pop-dotted for dimension. 
The "you and me" is from the Family Stories "Notecards" sheet along with this collection's enamel dots.
 The ribbon wrapped paper clip from Maya Road, decorative button for the flower's center and "Numbers" paper for the flower create a chic and trendy card for someone very special. The  Die Cut Accesories are used for the "love" and "together" and the "Noted" paper for the banner and people (card makers can fussy cut the people from the paper and use a glue pen to adhere border to the card front).
And the final card was created by embossing the cardstock with a wood grain embossing folder and inking it. I cut the "You and Me" journaling card and circle with people from the Die Cut Accessories sheet, added the two eyelets to the top and "hung" it on a Maya Road hanger with twine. The embellishment in the center of the card front are mounted to a bottle cap. Use glue dots to adhere it to the card front.
 And here is this cards inside:
Family photos from a 2011 trip to St.Louis, MO trip were used  with a hand made mini-album and Family Stories line of papers and embellishments to create the next project. Here's the cover:
I used black die cut chipboard for the covers and the Bind-it-All  spiral to hold the album together. My daughter made the beaded rings that are attached to the black spiral binding for added cover embellishment.
And here's a full frontal photo:
I added a small bag to the front cover and placed a black chipboard tag in it to hold a few additional photos and placed a journaling card to the front of the bag. 
 The pages of the book are made up of Family Stories "File Folders" and papers from the Family Stories line.

 I also used the Decorative buttons, and enamel dots throughout the album


Lastly, I would like to share two layouts:
I loved being able to add sequins (a hot new trend), pop-dotted arrows, buttons, chipboard pieces, and die cut accessories to this layout, along with some washi tape.


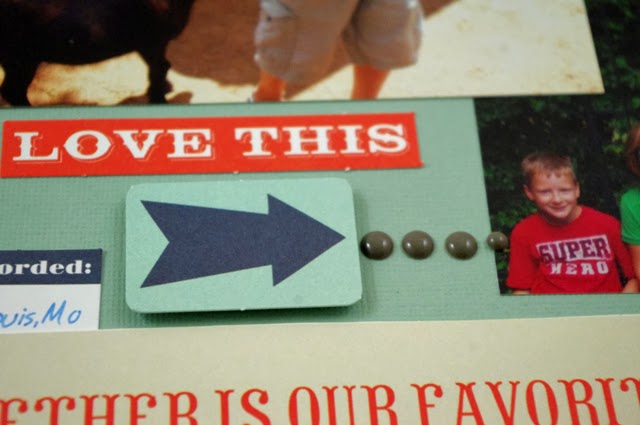
The second layout uses Die Cut Accessories, Decorative Buttons, and a border strip from the "Noted" paper. I used pop-dotted black cardstock circles in the four corners along with photo corners, and enamel dots to anchor the page.


Thanks for checking out my cards, mini-album and layouts created with supplies that are available at The Scrapbooking Studio online or in Moline, IL

Friday, January 25, 2013

{Valentine's Cards and More} Now & Then Collection


 Valentine's Day is just around the corner and it's time to get ready! Why not really "Wow" your family and friends with this 3-D card/mini? You can create this card with the Sizzix Album, Accordion Flip 3-D die designed by Karen Burniston for Sizzix.
CardsNowandThen3The double sided papers in the Now & Then Collecton from Teresa Collins is the perfect combination to mix with the die to create Valentine's with a masculine feel.
CardsNowandThen1
I used my scallop and heart shaped punches to add the Valentine touch along with the alpha stickers also available from the Now and Then collection. I tied a little netting into a bow and another bit into a knot to bring out an accent color. CardsNowandThen2
I also created this 6x6 card using the Now & Then Collection, Prima leaf, Maya Road wooden butterfly (colored with Smooch), hand dyed ribbon, Bo Bunny glazed brad, die cut flowers from the Now & Then collection, and adhesive word stickers. CardsNowandThen4CardsNowandThen5
Finally, I would like to share a 5x5 card created with the Now & Then clock paper (love it!), Distress Ink in Brushed Corduroy, die cut pieces, adhesive words and Enamel Dots ALL from the Now & Then Collection designed by Teresa Collins.CardsNowandThen7

Friday, January 18, 2013

{Layout} Now & Then


 We celebrated Thanksgiving at my sister-in-laws house in Wheaton, IL and enjoyed every moment! She had a newly remodeled kitchen so cooking for a group was NO problem:
LO1
 I love the word stickers that accompany the Now and Then Collection from Teresa Collins. You may want to grab the Collection Pack of papers-I noticed that this collection has a lot more color than what I am used to seeing from Teresa Collins.
LO2
 Prima pearl and crystal embellishments "Say it in Crystals" was the perfect flourished embellishment to add to this 12x12 layout.
LO3
 I loved the pack of die cut flowers (inked here) with a Enamel Dot center (also from the Now & Then Collection).
LO4
 Use the WeRMemoryKeepers 6" punch to create layers of decorative corners for your layouts.
LO5
 "So thankful" describes how lucky I feel to be a part of my husband's family! (And part of The Scrapbooking Studio family too-which is where you can find ALL of these wonderful products!).
LO6

Friday, January 11, 2013

{Mini-Album} with the Now and Then Collection


MiniAlbumNowandThen1
In June, my husband and I celebrated our 16th wedding anniversary at Country View Estates B&B Stillwater & Hudson, Wisconsin. They have beautiful gardens, several rescued pets, and a wonderfully lush huge home. I felt that the Now and Then collection from Teresa Collins was the perfect match for my pictures. 
Shelly here with a Mini-Album I would love to share with you: I started the mini-album by being inspired by several large tags from The Scrapbooking Studio and added die cut paper, stickers, word stickers, enamel dots, had dyed silk ribbons, a wire binding (Bind-it-All), and die cut pieces from the Now and Then Collection by Teresa Collins.
MiniAlbumNowandThen2
Along with several die cut images, a Maya Road bingo marker to help commemorate the anniversary year and Distressed Inked edges I added some of the die cut flowers from this collection.
MiniAlbumNowandThen4
MiniAlbumNowandThen3
We took a little side trip to the Leinie Brewery:
MiniAlbumNowandThen6
A glassine envelope is the perfect see through pocket for additional photos:
MiniAlbumNowandThen5
Thanks for taking a look at this week's project! Remember-you can get your hands on ALL of these fun scrapbooking goods at The Scrapbooking Studio in Moline, IL

Thursday, January 3, 2013

{Card} Pop'N Cuts designed with Teresa Collins papers


StudioSTJan2013PopNCuts1
Teresa Collins' Now & Then line of papers and embellishments was the inspiration for this week's card project. I LOVED her giant die cut flowers from the Now & Then line because they are printed on heavy card stock paper and the matching Enamel Dots work great for flower centers.
StudioSTJan2013PopNCuts6
I also used the Sizzix Pop'N Cuts dies to create this dimensional card. They were so much FUN! You have to try one of these dimensional dies today---The flowers really POP-right out at you. When I coupled the Pop'N Cuts dies (base,  and also Flower, 3-D (Pop-Up)) with the "Hello" set the card almost makes itself. Check out the dimension below:
StudioSTJan2013PopNCuts5
The Teresa Collins' Now & Then papers are nice and heavy and work great with the dies. Here's a picture of the card's inside:
StudioSTJan2013PopNCuts7I used a Spica glitter pen to outline the word "Hello" a bit on the yellow card stock. You can pick up all of these great card making items at The Scrapbooking Studio, Moline, IL 1623 5th Ave, Moline, IL 61265

Saturday, May 12, 2012

{New Sweet Tooth Layout Kits} Believe, Bloom, & Cheer


Here are three new layouts I would like to share with you today. Each kit includes all pre-cut photo mats, die cut shapes, flowers, buttons, borders, tags, ribbons, etc. just as shown in the photos. You'll  want to make sure you place your orders online now to assure you get all the kits you want.
Each kit includes color photo instructions.