Showing posts with label Paper Smooches. Show all posts

Wednesday, February 22, 2012

{Tip/Technique} Add Dimension & Texture

Adding Dimension and Texture to your project adds interest too. Don't hesitate to include ribbon, dimension (with pop dots) or with Honey Pop paper from Inky Antics (a featured manufacturer this month at A Walk Down Memory Lane) or pins, etc. You will love the "WOW" factor!
Here's how to do it:
Create a ribbon tab by folding a 2" piece of ribbon in half and staple it to the project with a Tiny Attacher.
I like to add ribbons as borders (run the ribbon through your Xyron first to make them stick the entire length of the ribbon) or use glue dots or staples (especially on guy themed projects).


Stamp the image on to the Honey Pop paper lining up the arrows on the stamp with those on the paper. Use pointy scissors to fussy cut the stamped image. Fold your A2 size card at 4 3/16 and 4 5/16 creating a gutter in fold of the card. Adhere the honey comb paper along both sides of the fold with the flat edge of the cut out piece in the fold.


"WOW", right?
Here's the card's front:
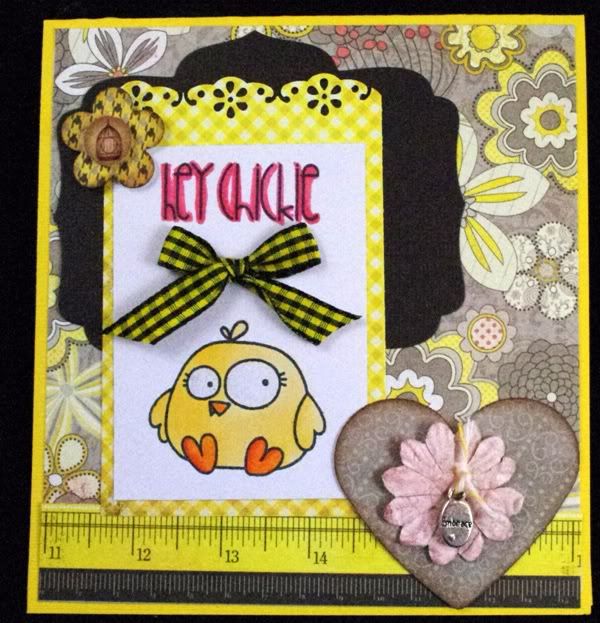
Dimension was added to the card front by using pop dots (both small and large) to create several layers and by tucking a pin with pennant to the top of the cupcake. Create a sweet cards using dimension for added interest and a great "WOW" factor. 

Supplies:
Papers: MME, Bazzill
Stamps: Inky Antics Cupcake Birdy, Inky Antics  Forest Friends #2
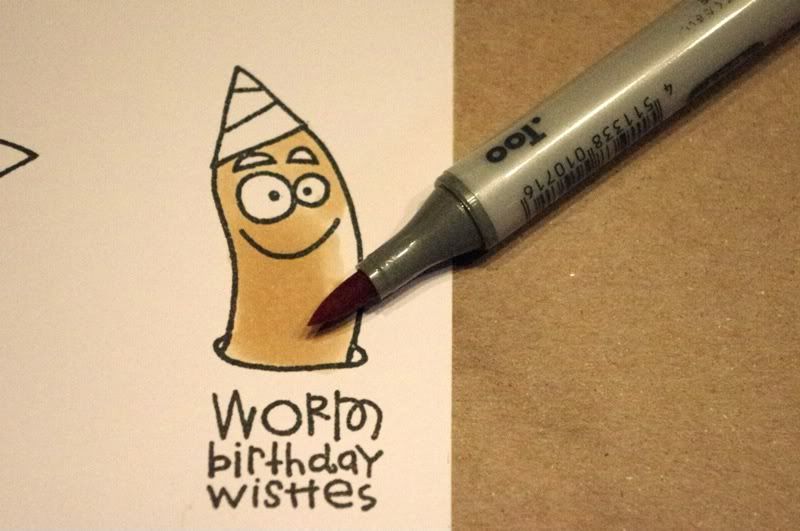
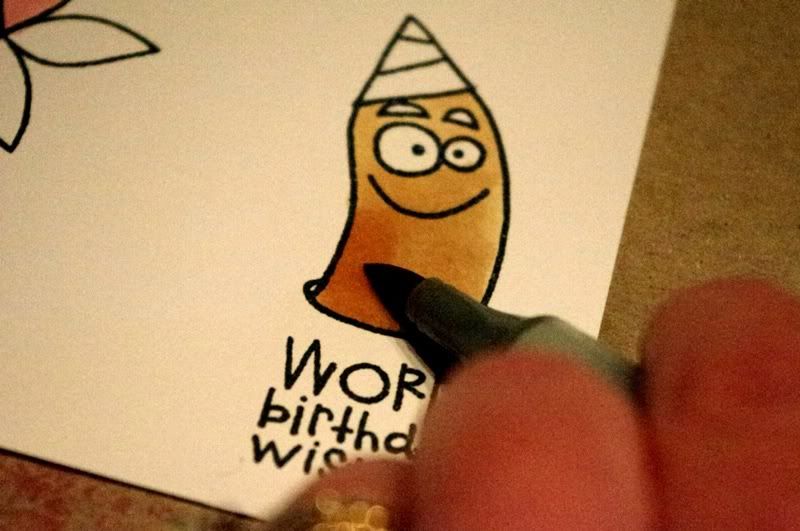
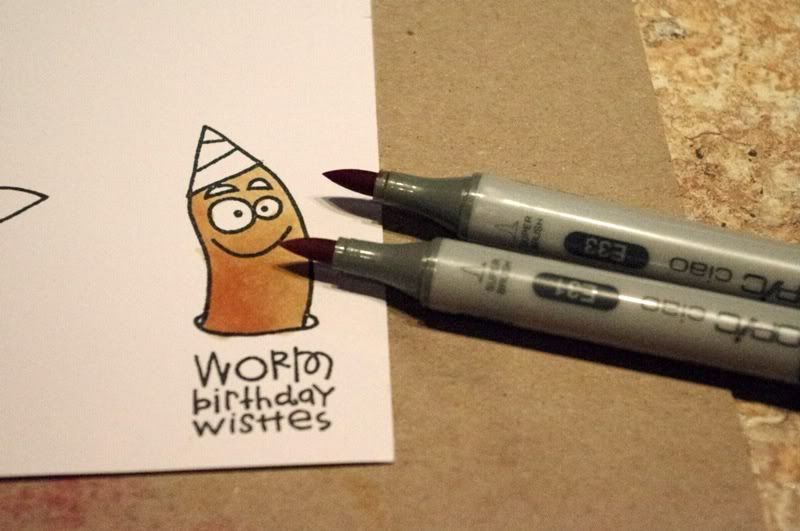
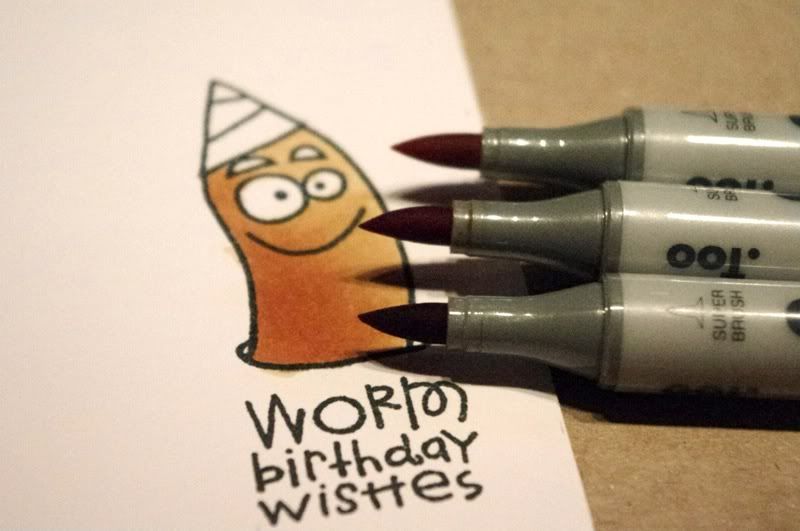
Ink Pads: Memento Tuxedo Black, Colorbox Cat Eye Ink Pads
Adhesive: Xyron, Pop Dots
Tools: Martha Stewart scoring tool, EK Success corner punch & label punch, label punch,  pointy scissors

Friday, January 27, 2012

{Step-by-Step} Basic Copic Blending


Have you seen colored stamped images that made you ask, "Wow, how did they do that?" Most likely the designer used Copic markers to color in their stamped images. Shelly here with some basic tips on how to color using Copic markers. It is important to practice this technique several times until you are feeling confident about your capabilities and then try it on your final stamped image. Here we go...

1. Choose your stamp. I look for open designs to use with Copic markers. Paper Smooches works great!

Posted Image

I am going to choose the worm along with the "Worm birthday wishes" stamped greeting for my image.

2. Next, select your Copic marker colors. Choose colors from the same family to create a nice blended look. I am going to use E31, E33, and E35 to color the main part of the worm's body. These are earth tones (E) containing the same intensity level "3" (Center #) and they step up in brightness (last #, here it is 1, 3, 5. 1 is the lightest color).

3. Make sure you've chosen the correct type of paper to stamp your images on using Momento or Distress Ink. This is important when creating good images that won't smear or bleed. 

4. I am using E31 first and coloring left to right using a circular motion. I am using the brush tip, bending it at the tip. Keep the outer edges wet to avoid streaks.
Resized to 82% (was 800 x 531) - Click image to enlargePosted Image

5. While this first color (base color) is still wet, add E33 to the left side. Lift up at the end of each stroke, leaving more ink on the left side and less on the right to create a shadow. 
Resized to 82% (was 800 x 531) - Click image to enlargePosted Image

6. Using the E31 Copic again, go back over the top of the E33 color using circular strokes again, mixing the two colors together and hopefully removing any rough edges. 
Resized to 82% (was 800 x 531) - Click image to enlargePosted Image

7. If necessary repeat steps 4-6 until your blended colors are even and there is no streaking or rough edges.

8. Adding the third color. Using the same technique as in #5 above, add # 35 on the left side of the image and lift up at the end of the stroke. Go back over the image with E33 to mix these two colors. Finish off the image with E31 all over the image.
Resized to 82% (was 800 x 531) - Click image to enlargePosted Image


Posted Image

Posted Image

Supplies: 
Paper: BazzillAuthentique
Ink: Memento
Stamps: Paper Smooches
Markers: Copic E31,E33,and E35 for the worm, Hat YG91 & YG95, E79, BG10
Punches: EK Success corner punch 

Friday, January 20, 2012

{Manufacturer Spotlight} Paper Smooches

It's time for AWDML's {Manufacturer Spotlight} Paper Smooches. Paper Smooches is an acrylic stamp manufacturer. Kim Hughes is the face behind Paper Smooches. Previous to "Paper Smooches" Kim illustrated for Cornish Heritage Farms, and she has over 900 project published in magazines and idea books so you most likely recognize her name.

You should think of “Paper Smooches” as using ink to smooch your paper with clear stamps! Paper Smooches stamps are made in the USA, from high quality photopolymer. I found them to make beautiful images the first time I tried them. I enjoy the "cute" designs and silly sayings and the openness of the stamp designs lends itself to COPIC MARKERS wonderfully. I am always looking for those types of stamps so you can imagine how happy I was to find Paper Smooches!

What really grabbed my attention were these title sayings that work great on cards or as titles for layouts. If I can use a stamp on both cards and layouts I am totally SOLD!!

Posted Image

Some inspiration via a card and layout I created using the stamps:
Posted Image
I used the Pretty Phrases and Friendly Flower stamps to create the page title:
Resized to 82% (was 800 x 531) - Click image to enlargePosted Image

I also created a few cards with the birthday buddies and chubby chums. (Love 'em!)
Posted Image

Posted Image
Supplies:
Stamps: Paper Smooches
Paper: Authentique (Blissful & Uncommon)Bazzill
Inks: MementoDistress Ink/Perfect Pearls
Misc: Maya Road: Charm, Prima flowers Twine: Twinery Chipboard die cuts: Authentique
Ribbon: MME
Stickers: Authentique Petite Type Circle
Dies/Punches: Accucut large flower die, Spellbinders, Marvy Uchida heart punch & small flower punch, Stamping Up Star punches, Tim Holtz Sizzix border die 

Wednesday, January 18, 2012

{Tip} Choosing Springy Copic colors


Spring and Easter are right around the corner, chances are your cards are going to reflect the season change. Get ready now by making sure your Copic collection has bright Spring colors from the YG, RV & Y color families.
Remember to pick at least two colors from each color family, pick a shade lighter than you think you may need. It's easy to add more color; but hard to take it away!
For blossoms, you may want to pick colors from the RV or Y color families.
Here's a quick refresher on the Copic marker labeling system:
I'll use RV 32 as an example. RV represents the color family "red/violet", the "3" is the intensity level so the partner for RV32 will also start with RV3_. The final number in the label, the "2" is the brightness level. I'll choose RV34 as the partner for my RV32.
I am using YG63, YG67, RV32, RV34, Y02, Y04, and Y08 on my stamped Paper Smooches images below. Paper Smooches acrylic stamp company has great images to use with Copic makers because of the open stamp designs.
Supplies:
Paper: BazzillAuthentique Splendid
Stamps: Paper Smooches Friendly Flowers
Punches: EK Success corner punch, Martha Stewart border punch
Die: Tim Holtz border die
Other: Bling & Maya Road Posie

Thursday, January 12, 2012

{Tutorial} Coffee Filter Custom Dyed Flowers


Shelly here with an EZ inky tutorial: Create dimensional custom dyed flowers using regular coffee filters, dye ink, and Perfect Pearls in just a few easy steps.
1. Gather your supplies: You will need four coffee filters, dye ink like Ranger Distress Ink, a small sprayer like the Ranger mini-mister, and Ranger Perfect Pearls as well as scissors, a heart shape to use as a template OR a die like  Sizzix  Flowers, 3-D #2, a heat tool, brad for flower center.
2.  Stack all four coffee filters together and fold into quarters.
3. Place heart shaped template over filter and cut around shape or die cut the four coffee filters in Vagabond (all at once) with Sizzix die:
4. Set the filters aside for a moment while you create your custom dye!
5. Collect your Perfect Pearls, Dye Ink and Ranger mini-mister. I choose colors to match my Authentique papers used on the "Hello" card pictured above.
6. Open the Mini-mister and add one dropper of dye ink into the container.
7. Open the Perfect pearls container and add a smidge of Perfect Pearls. I use a tiny plastic spoon for this.
8. Fill the rest of the Mini-Mister container with water, place the sprayer top on the container and shake, shake, shake. (Usually at this point I label the mini-mister with the dye ink color name for future reference).
9.  Set the cut coffee filters out individually on a surface that you can spray onto with out harming the counter. I use my Ranger non-stick craft sheet. Spray the filters with the mini-mister dye solution until they are saturated.
10.  Use a paper towel to soak up and puddles.
11. Dry the filters with the heat tool. Once the filters are dry, stack the filters on top of each other and use a pin to place a hole through the center of all four filters. I punched a 5/8" paper circle as a "washer" for the brad to go through and placed the washer on top of the four filters and attached all with the brad.
12. Fluff flower by folder and pinching the filters up around the brad. Fluff and flatten or keep the flower as bigger if you prefer.
13. Use a glue dot on the underside of the flower to attach to the top of a card or layout.
Create smaller flowers using a die like the Sizzix Flowers, 3-D #2 like this one I used on a layout:
6x6" Card Supplies:
Embellishments: Doodlebug Velvet brad
Tools: 5/8" circle punch, heat tool, Mini-mister, scissors, pin, heart template,  Corner punch