Friday, January 27, 2012

{Step-by-Step} Basic Copic Blending


Have you seen colored stamped images that made you ask, "Wow, how did they do that?" Most likely the designer used Copic markers to color in their stamped images. Shelly here with some basic tips on how to color using Copic markers. It is important to practice this technique several times until you are feeling confident about your capabilities and then try it on your final stamped image. Here we go...

1. Choose your stamp. I look for open designs to use with Copic markers. Paper Smooches works great!

Posted Image

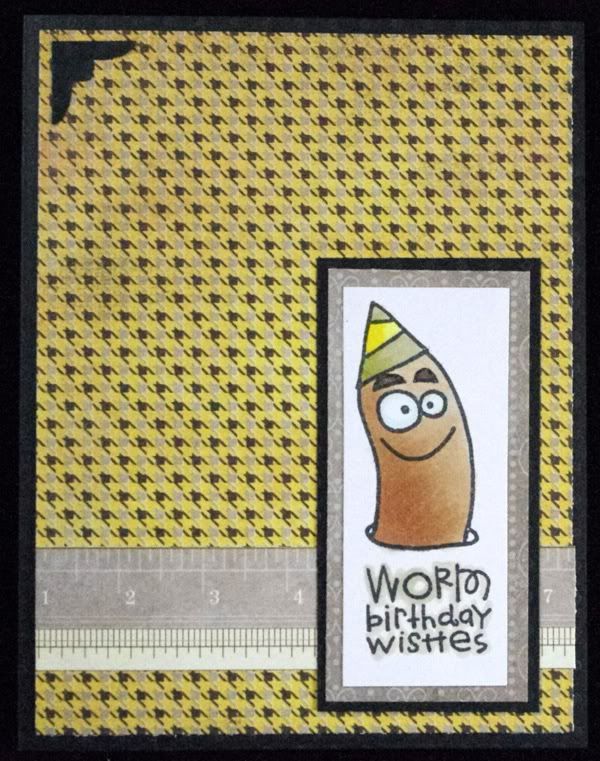
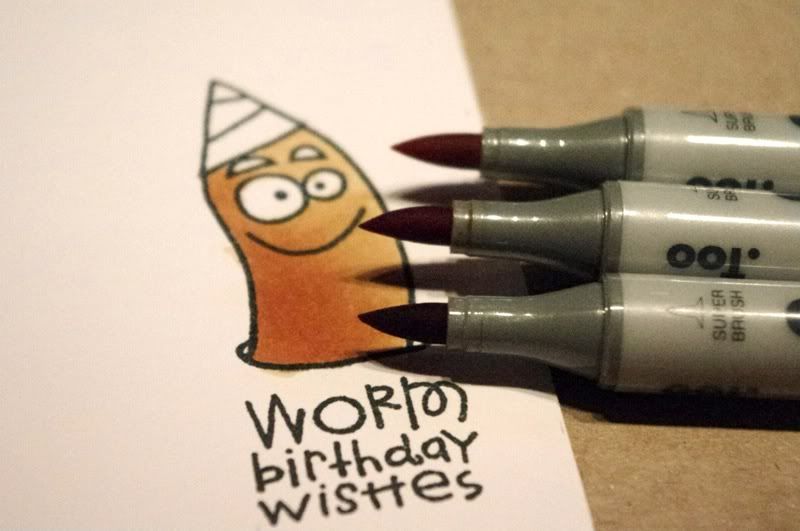
I am going to choose the worm along with the "Worm birthday wishes" stamped greeting for my image.

2. Next, select your Copic marker colors. Choose colors from the same family to create a nice blended look. I am going to use E31, E33, and E35 to color the main part of the worm's body. These are earth tones (E) containing the same intensity level "3" (Center #) and they step up in brightness (last #, here it is 1, 3, 5. 1 is the lightest color).

3. Make sure you've chosen the correct type of paper to stamp your images on using Momento or Distress Ink. This is important when creating good images that won't smear or bleed. 

4. I am using E31 first and coloring left to right using a circular motion. I am using the brush tip, bending it at the tip. Keep the outer edges wet to avoid streaks.
Resized to 82% (was 800 x 531) - Click image to enlargePosted Image

5. While this first color (base color) is still wet, add E33 to the left side. Lift up at the end of each stroke, leaving more ink on the left side and less on the right to create a shadow. 
Resized to 82% (was 800 x 531) - Click image to enlargePosted Image

6. Using the E31 Copic again, go back over the top of the E33 color using circular strokes again, mixing the two colors together and hopefully removing any rough edges. 
Resized to 82% (was 800 x 531) - Click image to enlargePosted Image

7. If necessary repeat steps 4-6 until your blended colors are even and there is no streaking or rough edges.

8. Adding the third color. Using the same technique as in #5 above, add # 35 on the left side of the image and lift up at the end of the stroke. Go back over the image with E33 to mix these two colors. Finish off the image with E31 all over the image.
Resized to 82% (was 800 x 531) - Click image to enlargePosted Image

Posted Image

Posted Image

Supplies: 
Paper: BazzillAuthentique
Ink: Memento
Stamps: Paper Smooches
Markers: Copic E31,E33,and E35 for the worm, Hat YG91 & YG95, E79, BG10
Punches: EK Success corner punch 

Wednesday, January 25, 2012

Class Registration is Now! Copic Spring/Easter Cards

Spring is sure to come, right? I can't wait! Register to day to get yourself in the mood for Easter & Spring! Several students have already registered and this class has limited seating so please don't hesitate to register for this Easter/Spring Copic card class today! Mark your calendars for March 7, 2012 at 6pm-8pm. Call The Scrapbooking Studio at (309) 736-7242 in Moline, IL to reserve your spot. Here's a peak at the samples:


You will receive three Ciao Copic Markers with your class kit (A $12 value). Each kit includes everything you see to complete five Easter/Spring themed cards plus color pictures, instructions, envelopes, and Copic tips/tricks throughout class. Each kit also includes a set of Maya Road chipboard alphas, stick pins, gorgeous ribbons!, calendars spots, Sweet November Stamps are used plus Prima flowers, canvas flowers, and Bottle Cap Images along with papers and fussy cut images from Bella Blvd. The following Cia Copic makers will be included with the class kit: E31 & R30, BG13 Please let the store know if you don't want the Copics and the class fee will be adjusted accordingly. You may also upgrade to sketch Copics if you desire. Other Copic markers used in class include: E21, 23, 31, & 33, R05,27,29,35, YG63, 67, 91, 95, V04, 09, BG10, 15, 18, G82, 85 and of course a colorless blender. Have the chance to try new techniques to color "stuff" that's not a stamped image including using Copics on chipboard, canvas, and naked flowers.

Tuesday, January 24, 2012

{Sketch Card Challenge}

It's time for a card sketch challenge! This sketch was created by AWDML's very own Lucy Chesna! Thanks for such a great sketch Lucy. Now, here it is:


And here's my take on it:

I used Copic markers to color the naked Prima flowers, flower centers are Authentique Splendid Chipboard die cut pieces as are the border strip, upper and lower embellishment pieces. Post your take on the sketch on the AWDML blog and put yourself in a drawing from AWDML!

Supplies:
Paper:   BazzillAuthentique Splendid
Chipboard Embellishements: Authentique Splendid
Flowers: Prima
Markers: Copic
Adhesive: Pop Dots

Monday, January 23, 2012

January Sweet Tooth Card Kits-Released!

Attention all pet lovers: You will want to grab a set of these fine furry birthday cards with kitties, fish, bunnies, turtles, puppies, and lots of birthday wishes and tucked inside each set. Retail $11.00
 Valentine's Collection of five cards: perfect for anyone you love or care about. Includes pre-assembled dimensional Valentine too! (It's cool, trust me). Retail $12.00

And last but not least: Miracle and Wonder-a set of baby congratulation cards designed for the most precious of occasions. Each kit includes an entire sheet of die cut images from Simple Stories along with felt flowers, ribbons, a pocket card, and lots more. Retail $11.00/five card kit.

Every Sweet Tooth Scrapbooking, LLC card kit includes color photo instructions as well as envelopes to feet each card. Check them all out at Sweet Tooth!

Sunday, January 22, 2012

Design Team Call: A Walk Down Memory Lane

Please spread the word to all your scrappy friends: A Walk Down Memory Lane is having a Design Team Call:
"We are so excited to announce that we are looking for 4 designers for our March 2012 – August 2012 team!! The call is open from January 20th through February 10th. We will be announcing the new design team on our blog and newsletter on February 15th. 

So WHO are we looking for?

We are looking for inspiring designers who are creative, ambitious and who can design with our products from the store. We are looking for designers who can display the following: 

- Open communication skills 
- Unique individual style 
- Individuals that can display flexibility, teamwork and cooperation 
- Ability to display and teach different techniques
- Ability to create layouts from a basic to a more advanced skill level 
- Creativity in the use of our products to help promote A Walk Down Memory Lane
- Ability to teach online classes and write up instructions, video tutorials are a plus!
- Must be able to work within deadlines and under pressure 
- Copic Certified designer is a plus

What do I need to Apply?

1) We would like you to submit Three (3) original layouts and one paper craft project that best represent you and your style. Acceptable paper craft projects would be altered items, cards, mini albums, etc. All submitted items must be your own design (they don’t have to be made specifically for this call) and e-mailed to DesignTeamCall@awalkdownmemorylane.net

2) Active participation on message boards and in galleries is important and will be considered when we chose our team. You will also be required to have an active blog

What to include in your Application besides your projects?

* Your name, address, e-mail address
* Links to online communities (forums, message boards, galleries) in which you are active in and regularly post to. Please include all links. 
* Link to your blog where you post your scrappy/stamp/paper craft creations.
* Links to other design Teams you are currently on, and scrapbook resume (if you have one). Prior design team experience is not required, however, preference may be given to those who are not committed to another DT. If you are currently on a design team please include how long you've been there, and when your term will end, also include your title there (for example: DT coordinator, strictly LO designer, etc) Also Let us know if you've been published and where (here's your chance to TOOT!).
* Answers to the “Time to get to know you” questions below. 
* A headshot and bio for our website and newsletter announcement

Time to get to know you!!! 

Please include your answer the following questions in your email submission: 
- How would you or others describe your style? 
- What is both your strengths and weaknesses when designing?
- Why do you want to be a part of our design team? 
- How much time would you be able to devote to your duties at A Walk Down Memory Lane 
- Give us your best idea for promotion our store. (ie. Blog hop, advertising in a magazine, etc.)
- Do you have a unique skill (for example, do you create sketches or make handmade scrappy items?) 
- What is your favorite food? 
- Give us an example of an online class that you could and would be willing to teach (you do not need to provide a write up or sample for this call!)

Now for the Nitty Gritty...What you’ll do as a DT member: 

1) Your DT term would be from March 2012 – August 2012 . 
2) Each month you must, create, at minimum 4 layouts & 1-2 papercraft projects. Your work must be sent in via email by the 25th of each month. You will be responsible for ordering your own products from the store and making sure that you have enough time to get your assignments done for your deadlines.
3) Post your DT layouts on galleries and blogs throughout the web, whenever possible, link to AWDML. Watch other promotion Message Boards and Blogs for product chats and talk us up where possible.
4) Participate in Facebook and blog discussions on a regular basis and keep the Facebook page going by regularly posting new topics, games, challenges, tips & tricks, project examples, etc. 
5) Newsletter participation is a must, you must sign up monthly for at least two newsletter articles per month (product highlight, small project with instructions, sketches, etc)
6) You must have a “scrapblog” or a blog that you talk about scrapping on and update it regularly each week with a post about projects you’ve used from the store, featured manufacturer, or whatever. We ask that you also have links to our site and your DT blinkie on your blog and other sites where allowable.
7) Be the eyes and ears for AWDML online, finding new inspiration or ideas and sharing them to help our community grow.
8) Each DT member will be required to post to the AWDML DT blog once per week. You will also be required to post a class and a challenge once a month. We will have a rotating schedule so you don’t have to do BOTH in one week.
9) You will be responsible for weekly posts on our Facebook page
10) You must sign and return the AWDML DT contract before your DT term begins.

What do you get in return?

- As a design team Member you will receive your choice of product, with a $30 value, from AWDML.com free of charge, including free shipping. 
- As a design team Member you will receive a package of featured manufacturer goodies each month free of charge to send out to RAK winners from your blog.
- DT Members receive 30% off of orders placed in the www.AWDML.com store (up to $50 per month) and free shipping on those orders as long as they are shipped with their monthly DT package.
- DT Members bio and head shot will be featured on our design team page. 
- DT Members designs will be featured in our weekly newsletter. 
- DT Members blogs will be linked from both the AWDML store blog.
- DT Members will receive 5% of sales that originate with their blog, IF they sign up with our affiliate program.

** Important information regarding international applicants
International designers, if you are chosen you will be responsible for paying the shipping difference each month, and please keep in mind that we do expect you to keep with existing deadlines. 

Please e-mail any questions and submissions to DesignTeamCall@awalkdownmemorylane.net "

Friday, January 20, 2012

{Manufacturer Spotlight} Paper Smooches

It's time for AWDML's {Manufacturer Spotlight} Paper Smooches. Paper Smooches is an acrylic stamp manufacturer. Kim Hughes is the face behind Paper Smooches. Previous to "Paper Smooches" Kim illustrated for Cornish Heritage Farms, and she has over 900 project published in magazines and idea books so you most likely recognize her name.

You should think of “Paper Smooches” as using ink to smooch your paper with clear stamps! Paper Smooches stamps are made in the USA, from high quality photopolymer. I found them to make beautiful images the first time I tried them. I enjoy the "cute" designs and silly sayings and the openness of the stamp designs lends itself to COPIC MARKERS wonderfully. I am always looking for those types of stamps so you can imagine how happy I was to find Paper Smooches!

What really grabbed my attention were these title sayings that work great on cards or as titles for layouts. If I can use a stamp on both cards and layouts I am totally SOLD!!

Posted Image

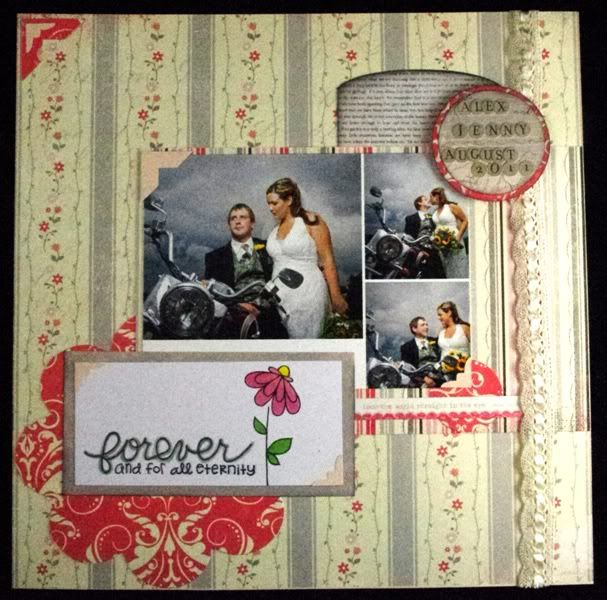
Some inspiration via a card and layout I created using the stamps:
Posted Image
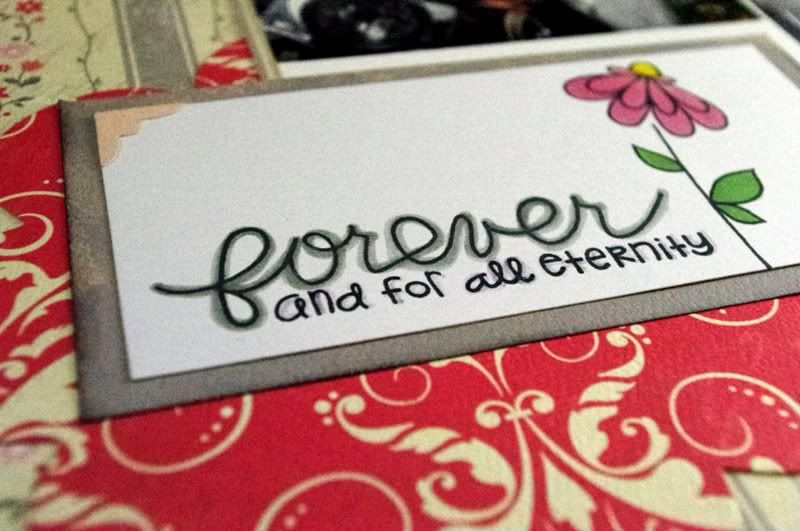
I used the Pretty Phrases and Friendly Flower stamps to create the page title:
Resized to 82% (was 800 x 531) - Click image to enlargePosted Image

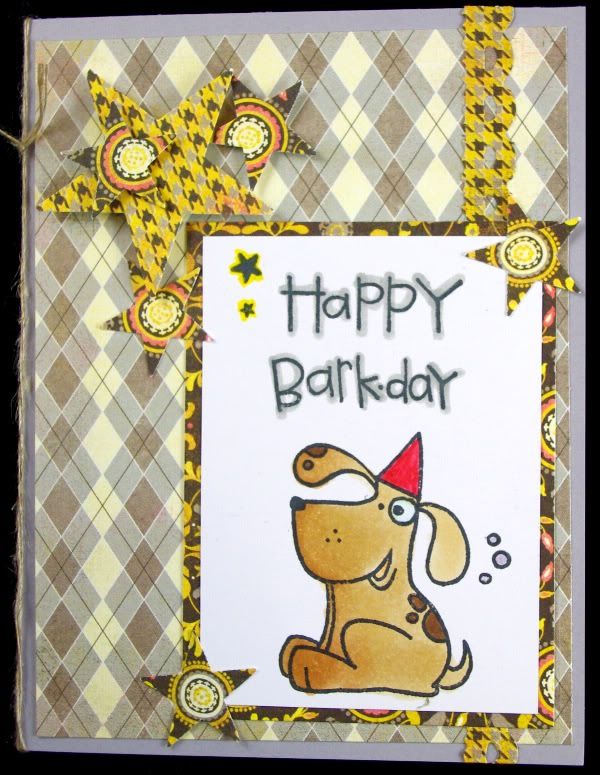
I also created a few cards with the birthday buddies and chubby chums. (Love 'em!)
Posted Image

Posted Image
Supplies:
Stamps: Paper Smooches
Paper: Authentique (Blissful & Uncommon)Bazzill
Inks: MementoDistress Ink/Perfect Pearls
Misc: Maya Road: Charm, Prima flowers Twine: Twinery Chipboard die cuts: Authentique
Ribbon: MME
Stickers: Authentique Petite Type Circle
Dies/Punches: Accucut large flower die, Spellbinders, Marvy Uchida heart punch & small flower punch, Stamping Up Star punches, Tim Holtz Sizzix border die 

Thursday, January 19, 2012

Sweet Tooth Crop Registration: Spring 2012


(ID#340) Spring 2012 Sweet Tooth Crop-North Liberty, IA

Mark your calendars for
March 2, 2012 4pm-Midnight & March 3, 2012 9AM-9PM


Twenty hours of crop time with all your best buddies in a gorgeous, spacious setting...
Come and relax in the comfort of friends at the South Slope Community Room in North Liberty, IA.
We've hosted lots of crops and the ones at South Slope are alway the biggest and best. Now it's your turn to sit back, relax, let us do the cooking & cleanig. Leave the kids & hubby at home and join your best friends and Sweet Tooth for a relaxing weekend. Each cropper will enjoy a spacious crop area, lots of wonderful surprises & of course a goody bag at each spot!

Come & see why this is the crop that everyone is talking about.
For Only 
$89 


Here's everything you'll enjoy...
Sweet Tooth Exclusive Goodies delivered right to your spot!

Enjoy a home cooked meal Friday night & on Saturday you'll enjoy lunch & dinner along with lots of beverages, snacks & sweets provided throughout the weekend.

Make-n-Takes, SHOP all weekend long from a variety of vendors like Sweet Tooth, Close to My Heart, Scentsy, Creative Memories, and others.

Lots of door prizes, a few surprises along with a Grand Prize Drawing on Saturday
  • and the best part: 
    it's all about you & gettin' in some much needed croppin' time
    with all your besties.

  • Friday, March 2, 2012 4pm-12 midnight
    Saturday, March 3, 2012 9 am-9pm


    Register NOW!

    Wednesday, January 18, 2012

    {Tip} Choosing Springy Copic colors


    Spring and Easter are right around the corner, chances are your cards are going to reflect the season change. Get ready now by making sure your Copic collection has bright Spring colors from the YG, RV & Y color families.
    Remember to pick at least two colors from each color family, pick a shade lighter than you think you may need. It's easy to add more color; but hard to take it away!
    For blossoms, you may want to pick colors from the RV or Y color families.
    Here's a quick refresher on the Copic marker labeling system:
    I'll use RV 32 as an example. RV represents the color family "red/violet", the "3" is the intensity level so the partner for RV32 will also start with RV3_. The final number in the label, the "2" is the brightness level. I'll choose RV34 as the partner for my RV32.
    I am using YG63, YG67, RV32, RV34, Y02, Y04, and Y08 on my stamped Paper Smooches images below. Paper Smooches acrylic stamp company has great images to use with Copic makers because of the open stamp designs.
    Supplies:
    Paper: BazzillAuthentique Splendid
    Stamps: Paper Smooches Friendly Flowers
    Punches: EK Success corner punch, Martha Stewart border punch
    Die: Tim Holtz border die
    Other: Bling & Maya Road Posie

    Monday, January 16, 2012

    Introducing: Stamp School


    A Walk Down Memory Lane will be carrying the line here http://www.awdml.com...amp-school-299/ . 
    Plus Lisa, AWDML store owner,  has her own cardstock and ink pads to sell with her stamps :)

    Its so exciting and sending big congrats to Lisa and her new venture!!!!!!!!!!!!!! 


    Keep your eyes on the blog for some exciting new samples using Stamp School products.

    Thursday, January 12, 2012

    {Tutorial} Coffee Filter Custom Dyed Flowers


    Shelly here with an EZ inky tutorial: Create dimensional custom dyed flowers using regular coffee filters, dye ink, and Perfect Pearls in just a few easy steps.
    1. Gather your supplies: You will need four coffee filters, dye ink like Ranger Distress Ink, a small sprayer like the Ranger mini-mister, and Ranger Perfect Pearls as well as scissors, a heart shape to use as a template OR a die like  Sizzix  Flowers, 3-D #2, a heat tool, brad for flower center.
    2.  Stack all four coffee filters together and fold into quarters.
    3. Place heart shaped template over filter and cut around shape or die cut the four coffee filters in Vagabond (all at once) with Sizzix die:
    4. Set the filters aside for a moment while you create your custom dye!
    5. Collect your Perfect Pearls, Dye Ink and Ranger mini-mister. I choose colors to match my Authentique papers used on the "Hello" card pictured above.
    6. Open the Mini-mister and add one dropper of dye ink into the container.
    7. Open the Perfect pearls container and add a smidge of Perfect Pearls. I use a tiny plastic spoon for this.
    8. Fill the rest of the Mini-Mister container with water, place the sprayer top on the container and shake, shake, shake. (Usually at this point I label the mini-mister with the dye ink color name for future reference).
    9.  Set the cut coffee filters out individually on a surface that you can spray onto with out harming the counter. I use my Ranger non-stick craft sheet. Spray the filters with the mini-mister dye solution until they are saturated.
    10.  Use a paper towel to soak up and puddles.
    11. Dry the filters with the heat tool. Once the filters are dry, stack the filters on top of each other and use a pin to place a hole through the center of all four filters. I punched a 5/8" paper circle as a "washer" for the brad to go through and placed the washer on top of the four filters and attached all with the brad.
    12. Fluff flower by folder and pinching the filters up around the brad. Fluff and flatten or keep the flower as bigger if you prefer.
    13. Use a glue dot on the underside of the flower to attach to the top of a card or layout.
    Create smaller flowers using a die like the Sizzix Flowers, 3-D #2 like this one I used on a layout:
    6x6" Card Supplies:
    Embellishments: Doodlebug Velvet brad
    Tools: 5/8" circle punch, heat tool, Mini-mister, scissors, pin, heart template,  Corner punch

    Monday, January 9, 2012

    Create Masculine Cards easily with the newest line of papers, ribbons from American Crafts

    Create wonderful masculine cards with the newest line of papers from American Crafts: Chap! The deep rich colors drew me in right away! The coordinating upscale ribbons is absolutely gorgeous. It's so hard to find masculine ribbon-I was thrilled when I walked into The Scrapbooking Studio last week and saw this line right away. Yeah!! 
     Don't forget to use the Tim Holtz Tiny Attacher to hold down the ribbons. Metal anything always adds a bit of masculinity to a card. The metal rimmed brads from Basic Grey do this as well as the embossed texture pictured below.
    Add "guy" texture with Tim Holtz's embossing folders run through the Vagabond, ink the edges with Ranger distress Ink. Use stamps like Wendy Vecchi's Destination Art collection, Basic Grey brads used for hub caps on old car, and twine used on banner all come together to say,"This card is all for him".
     I love this flannel look wide ribbon :) coupled with Tim Holtz's on the edge die, JustRite cling stamps and dimensional pop dots this card looks sophisticated!
    Why not include checks, gift cards and a note when you create a masculine pocket card? Try fraying the ribbon's ends and tacking them down to card front with brads to give the card a more masculine feel. Don't forget to include some metal on your best guy's card! A key to your heart is just the thing to add dimension and interest. Attach it with twine.

    I LOVE the double sided patterns and colors this "Chap" American Craft paper collection offers. Mix it up with all the great metal and ribbons available at The Scrapbooking Studio, Moline, IL and you'll create a recipe for successful masculine card making! Thanks for taking a look. See you at the Studio.