Monday, May 26, 2014

"Happy Tails" BoBunny Pet Collection with Shelly Maxwell

Four-legged friends are the best so don't leave your pets out of your scrapbooks! Capture their silly personality and character with BoBunny's pet line "Happy Tails". Here's a layout I created of our family dog, "Blake". We adopted him two years ago from a no-kill shelter in Iowa. Mostly, he just lays around:
 Grab the whole "Happy Trails" collection at The Scrapbooking Studio in Moline, IL! Check out all the projects, layouts, and cards you could create using this huge line of papers and embellishments. Use American Craft Thickers to create quick and easy titles.
 These fun dog silhouettes make great page embellishments when they are layered mixed with BoBunny Happy Trails Buttons and twine.
 Here kitty, kitty...this one is an adorable Iowa Farm cat named, "Julianne" in honor of my daughter, Julianne, who was visiting a friend at her home and just happened to visit the new litter of kittens and was able to help name them. That was a few years ago...


 I fussy cut a larger sheet of Happy Trails paper to create this border along the left edge of the paper. I also used the WeR Mini 8 Trellis punch to create the round, doily like, photo mat seen below.
 Journaling cards taken from the  papers work great to create pet themed cards:
They turn out adorable both inside and out:
 BoBunny Buttons with layered journaling cards create this thoughtful card inside.
 Grab your Copics, some Spica glitter markers, a Maya Road Canvas Star Coaster Album, and a few circle punches and you're ready to create a purse size mini-album:
 I added a few of the BoBunny buttons for embellishments, used the Spica Glitter pens to doodle.
 I fussy cut dog tags and pop-dotted them over die cut journaling spots. Copics and blending solution create matching background canvas pages.
 I used Zip Dry liquid adhesive to glue my paper pieces to the canvas album pages, then I used my Copic markers around the photo mats, I blended some of the colors with blending solution, and then added details with the Spcia Glitter pens. This fun Mini-Album is going to be a favorite of my families because it contains their beloved Blake!Thanks for checking out this months projects for The Scrapbooking Studio, Moline, IL.

Thursday, May 22, 2014

Register for June Copic Class toay! 309-736-7242

Registration is now OPEN!
June Copic Card Class
Wednesday, June 11, 2014 6-8PM
Cost $20/Kit
Call to Register today: 309-736-7242
Create five cards using Copic Markers for the most brilliant stamped images ever...
Inspirational summer themed cards created with corrugated paper, adorable stamps, bright Copic Colors, and lots more!


Each class kit includes instructions complete with color pictures and envelopes, pre-stamped images, many pieces pre-cut for the easiest assembly! 
We will be using the following markers & adhesives in class: 
Y04, Y08, Y32, Y28,
YR12, YR14, YR15
E000, E02, E13, E21,  E23, E70, E71, E74
 RV02, RV04, RV21, RV25, RV93, RV95 
FYG1, FBG2, 
R02, R05 (optional)
B16
BG11, BG13, BG72, BG75
Y000, Y00, Y02, Y04, Y08, 
YG01, YG05, YG06,  YG23
 G07, G09
Spicas: Clear, Sand, Mint, Black, Red, Lemon
Multiliner: 0.03 Black
Brown Cat Eye Ink pad, pop dots, glue dots, adhesive, pointy scissors
You are welcome to borrow my markers during class if you don't own them all.

Tuesday, May 13, 2014

Card Class: Distress Markers May 28, 2014

Create five stunning cards using Ranger's Distress Markers, dies, inks and more! Join me, Shelly Maxwell, on Wednesday, May 28, 2014 from 6-8PM at The Scrapbooking Studio, Moline, IL
We will be using Wendy Vecchi stamps, Archival Inks, Distress Marksers, Tim Holtz dies, and lots more!  
Learn basic water color techniques using Distress Markers along with a few advanced techniques too.
Cost $18/kit. Each kit includes instructions, photos of finished cards, envelopes and all images pre-stamped ready to color.Please bring some or all of the following Distress Markers to class with you: Aged Mahogany, Victorian Velvet, Wild Honey, Peeled Paint, Worn Lipstick, Crushed Olives, Iced Spruce, Spun Sugar, Vintage Photo, Evergreen Bough, Picket Fence, and your wide and detailed water brushes, your favorite adhesives, glue pen, glue dots, pop dots. Call The Scrapbooking Studio to make your reservation today! 309-736-7242

Monday, April 28, 2014

Welcome Spring with Imaginisce

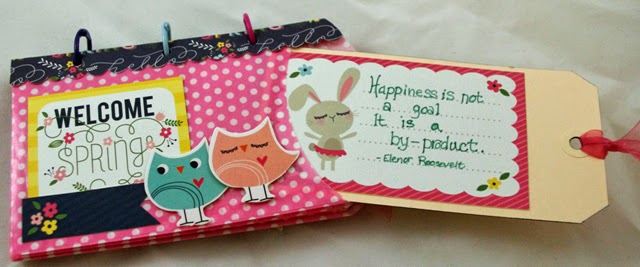
Welcome Spring is a happy new line of papers and embellishments from Imaginisce/American Crafts. I've created some cards, layouts and a mini-album using this joyous new line filled with springy colors. 
 Martha Stewart butterfly punches, Imaginisce die-cut cardstock shapes, and Pebbles printed bags helped get my imagination going. Inspiration on how to create the unique folds of a few of the cards came from Card Maker magazine.


Here are a few layouts with Bo-Bunny Cardstock and Welcome Spring patterned papers:
 A grouping including Maya Road bingo marker and acetate tickets, wooden and chipboard buttons add masculinity to the layout:


 I love WASHI tape and WeRMemory Keepers has Chevron shaped tape-I used STONE on my layout below:
 To adorn my the layout I created for my daughter, I used some fussy cut butterflies from the Hello Spring line and a We R Memory Keepers punch 6 inch Trellis Mini-8-Punch for the white background paper. I cut the 12x12 white printed paper down to 10x10 and then used the punch on the corners, turned the paper "on point" or in a diamond shape and adhered it to the pink cardstock. I then placed photos over the parts of the white punched paper that were straight to make the white printed paper look like I had cut the entire 10x10 edge background piece all the way around the edges (but I really didn't).


 Pebbles printed bags are the perfect mini-album backdrop for the Welcome Spring papers from Imaginisce/American Crafts:
 I cut a piece of printed paper to the same length as the printed bag, accordion folded it, then scallop punched the front edge only.
 I used Zip Dry liquid adhesive on the front and back upper edge of the printed bags and in the inside gutter of the accordion folded papers to adhere the "pages" or pockets to the top binding. I used my Crop-a-Dile to punch through the binding and placed three hinged rings in the holes for added stability.
 I used the journaling cardstock paper from the Welcome spring line and die-cut cardstock shapes for embellishment throughout the book.

 We R Memory Keepers Chevron Washi tape (stone) was used as a border:
 EK Success 2.25" circle punched was used for pictures on some pages and 2.5" circle punch was used to create a background circle for the 2.25" punched pictures. I used Distress Markers in chipped saphire, peacock feathers, evergreen bough on journaling pieces, and an American Crafts Slick Writer in Black on the printed bags.
Thanks for checking out this month's projects! Remember, you can pick up all of these goodies at The Scrapbooking Studio, Moline, IL online or at their store.

Copic Card Class May 14, 2014 6-8PM

Join me for Copic Card class
Wednesday, May 14, 2014 
6-8 PM

1623 5th Avenue
Moline, IL 61265

The May Copic Class features five cards using a variety of Copic markers, fun fold techniques, and more. We will be creating three sympathy cards, one wedding card, and one Father's Day card (which can also be used as a birthday card).  

We will be using our Copic markers to color on a variety of different surfaces including paper flowers, Tim Holtz die cut tissue paper flowers, and ribbon. You won't want to miss out on any of these terrific card ideas. Call the store to register today: 309-736-7242. Cost $20/kit. 


We will use the following markers in class: B00, B01, B02, B04, Y32, Y35, E21, E23, BG72, BG75, E07, E09, T4, T5, G82, G85, B14, B16, G43, G46. We will also use a black and metallic silver cat eye inks in class. You are welcome to borrow my markers during class if needed.

Sunday, April 6, 2014

"All Boy" October Afternoon Design Team Projects-The Scrapbooking Studio, Moline, IL


October Afternoon's "All Boy" collection has arrived at The Scrapbooking Studio, Moline, IL and you're going to want to grab some of these adorable papers, along with Daily Flash Memory cards and Daily Flash Blurbs before it's too late! 
 These heavy duty double-sided papers are completely versatile for little boys, boys, and young adults.

 I've used some silver brads, wooden buttons, twine, and Maya Road acetate to create this card perfect for young adults:
 Layered Daily Flash "All Boy" Flash Blurbs and "this is so Cool" saying from Double Dog Dare paper along with Maya Road acetate tickets complete the look for a congratulatory card:
I would also like to share a two-page layout created with the collection. I used American Craft Thickers "Emma" in silver for the "ELVIS @ Graceland" title", the glitter paper is from Reminisce's Glitter Factory line (Sunlit Pool), 


 HINT: When using glitter paper I've found that pop dots work the best for adhering items to the paper.
Finally, I would like to share a mini-album created with Jillibean Soup's Corrugated Red Starburst Album:
I replaced the hinged ring it came with with a slightly large ring of my own to accommodate the thickness of my album.
 I used a starburst die with buttons throughout the album along with Queen Candy Shoppe Candy Stripers in blue to create unity.
 Daily Flash Memory Cards with used as photo mats and journaling cards throughout the album as well.
 "Tickets" for camel rides are written on acetate Maya Road tickets using an American Craft Slick Writer Pen in Black.

 Fussy cutting the bug critters (All Boy "Me First") was a fun and inexpensive way to embellish the mini-album throughout...
Thank you for taking a look at my newest Design Team projects for The Scrapbooking Studio. Remember you can shop in person at their Moline, IL location or online at www.thescrapbookingstudio.com